This
portion of the build-out was fraught with frustration. There were
a large number of components that had to be assembled to make the
system as a whole functional. Most of these components were
acquired online through vendors that I had never used before.
Additionally, we purchased a substantial quantity of stuff from
familiar vendors, such as West Marine, to get the task completed.
Sadly, this portion of the effort spanned many weeks and offered us a
number of challenges.
The photos below are what we saw.
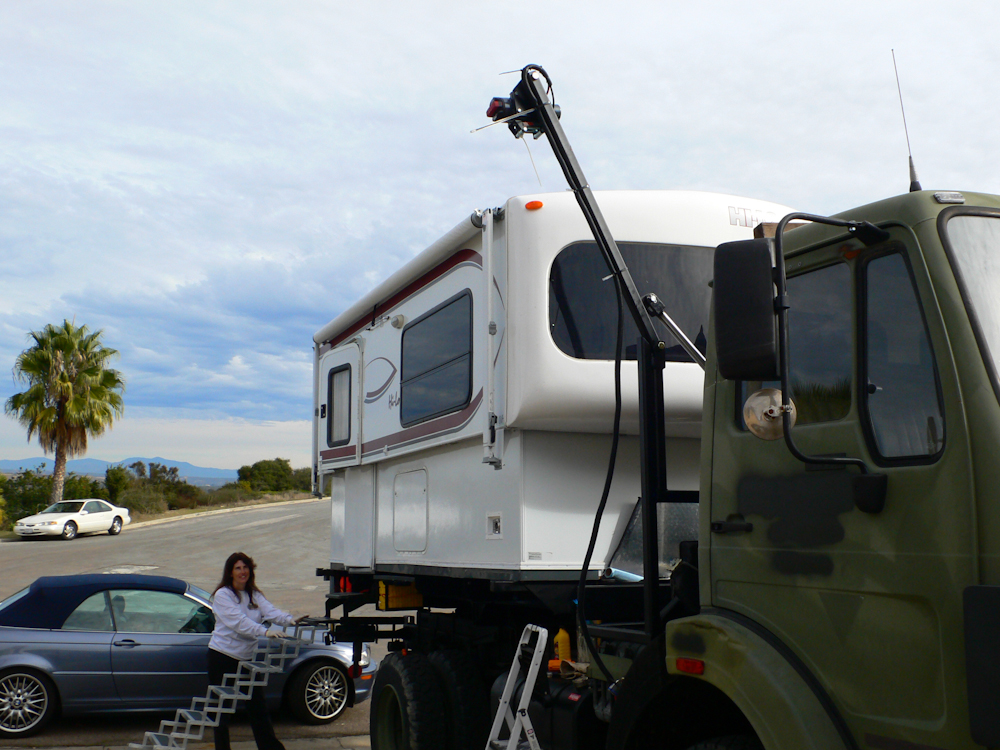
We
actually used the 1017A as a camper over Thanksgiving. We went to
the desert with our Unimog buddies and took our quads on our
trailer. We had a great time and the truck performed as
expected. But, it would have been nice to have had 120 VAC in the
cabin. We had not yet installed the inverter, so we had to rely
on our on-board Honda generator for AC service while camped. The
generator worked as expected, so we were happy. Upon our return
to San Diego, we started in on the high-current electrical
modifications required to make the tire crane system operate.
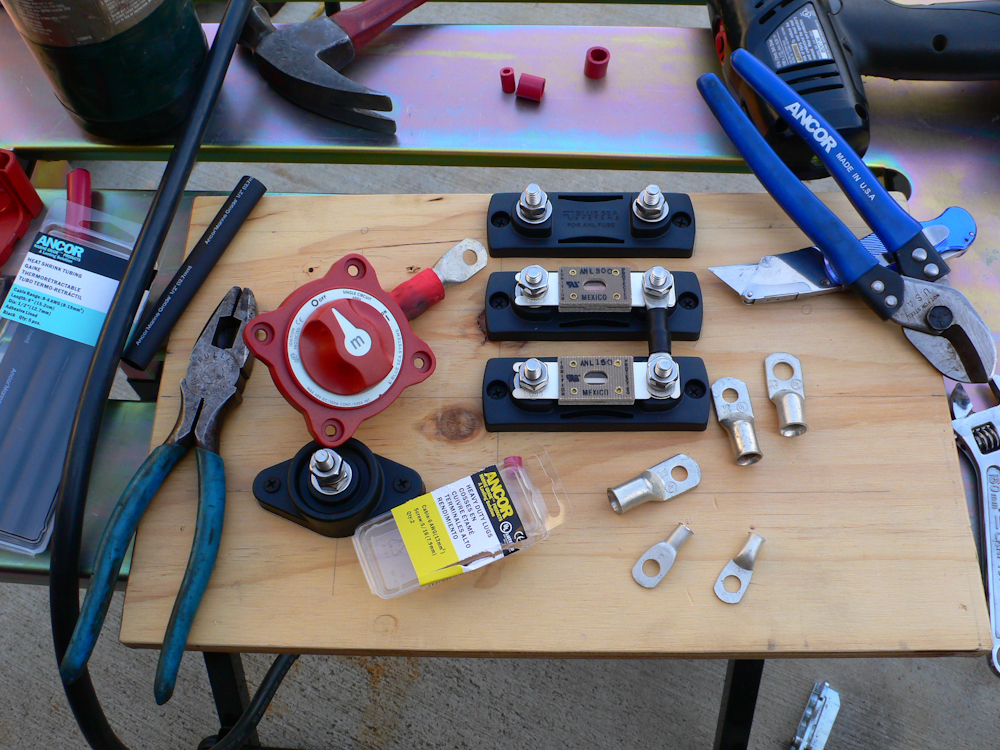
Above is a photo of the first stages of the high current control
board. Everything that was done had to be done as a temporary
solution as my tool boxes were still on order and were not expected for
at least another 2 months. So, I dispensed with the pleasantries,
got the credit card out and went to West Marine for components and
cable. $800 later, I had most of what I needed, but still no
inverter. But, we did have enough components to get the
hydraulic/winch system operational.
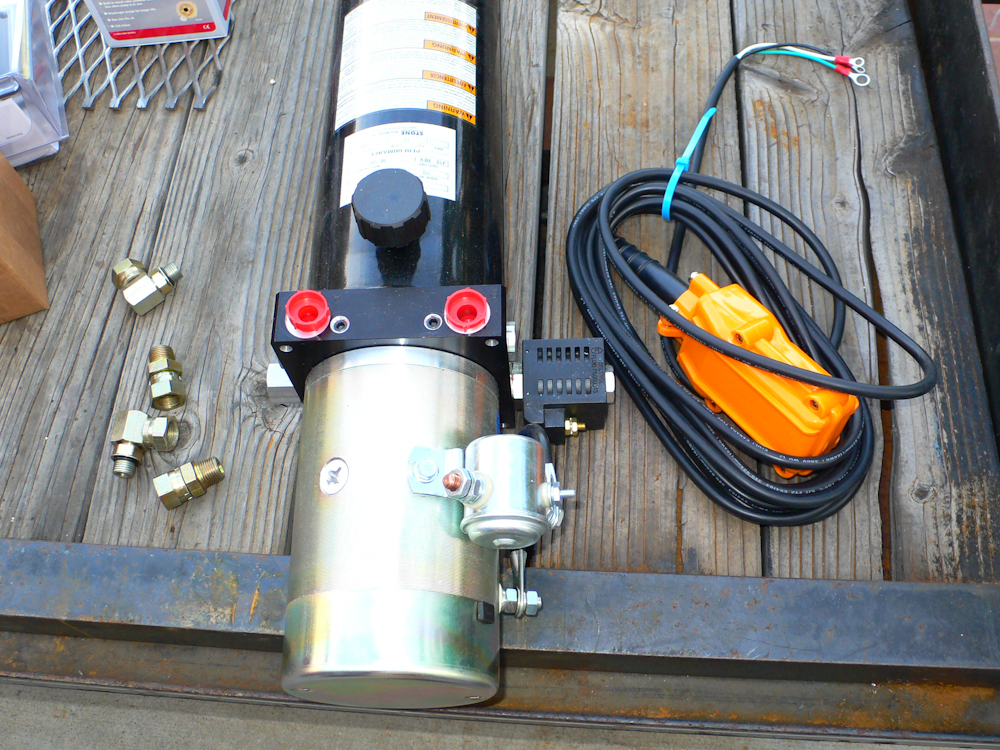
I
had purchased the dual action hydraulic pump system online from an
unknown vendor. The vendor did come through in the end, but
it took weeks for the entire order to be correctly fulfilled.
But, due to my own lack of knowledge about such things, I still needed
fittings, connectors and hoses. These were also ordered online
from various vendors, some known some new. Above is a shot of the
dual action hydraulic pump, reservoir, swivel fittings and the control
dongle. The control dongle would later provide some interesting
entertainment.
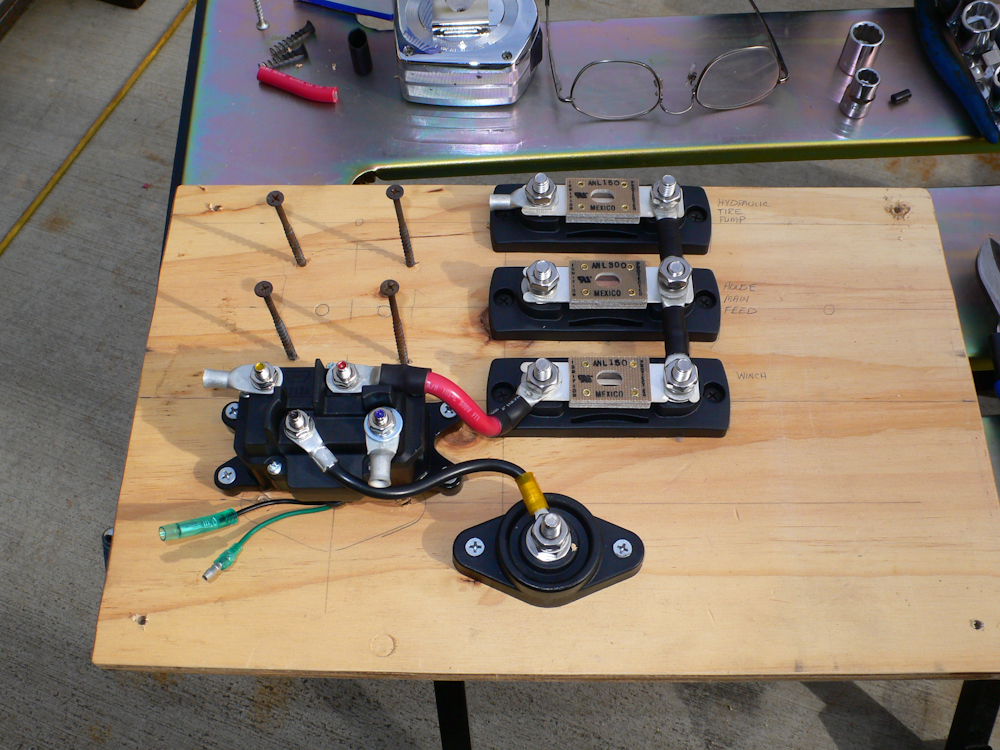
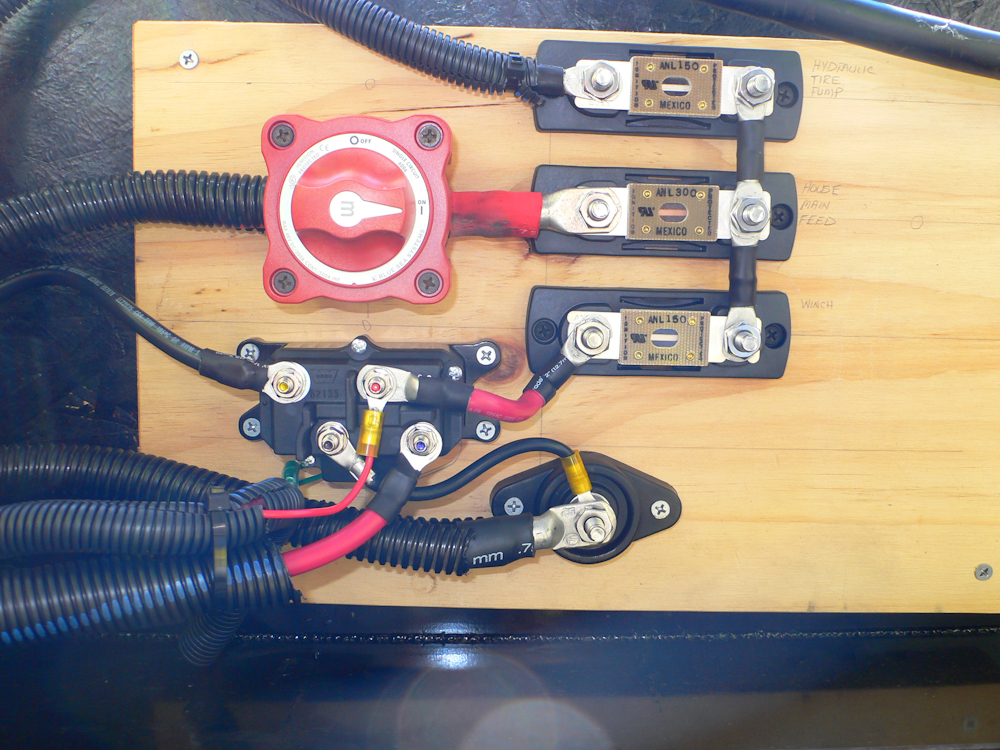
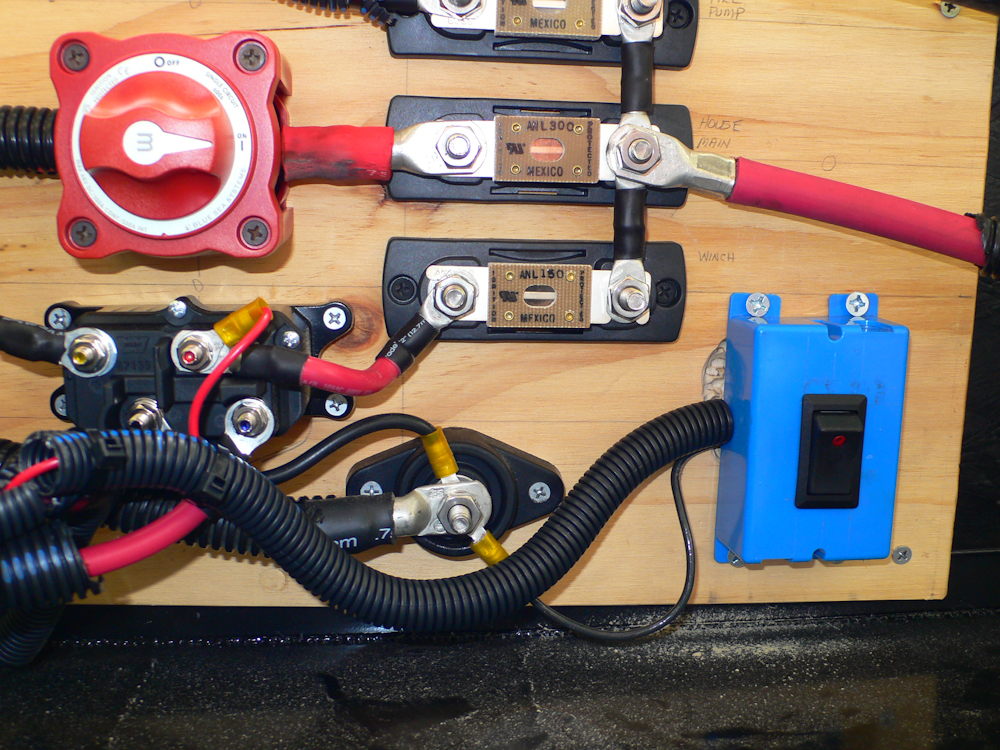
After
testing some preliminary component layouts, I settled on one that would
likely work. Above, the 4 screws are the mounts for the
high-current switch that will connect the house battery array with all
"downstream" consumers. The 3 objects on the right are ANL fuses;
the top and bottom are 150 Amps for the pump and tire lift winch and
the center one is 300 Amps for the house inverter. The object
with the 4 terminals is the winch control solenoid that switches the
current for the winch motor and reverses the polarity if so
commanded. The bottom, odd-shaped item is a PowerPost that is
used to connect multiple terminals. All components were laid out
on plywood and then attached with wood screws for mechanical robustness.

Making
wiring harnesses is both tedious and time-consuming. Since these
were high current harnesses, extra care was given to construction,
routing and encapsulation in loom material to prevent chaffing. I
used #6 marine grade battery cable and it was about $4.50 per
foot. Ouch. The photo above shows the winch fully wired,
but not yet testable. Much wiring must be done before such a test
can be completed.
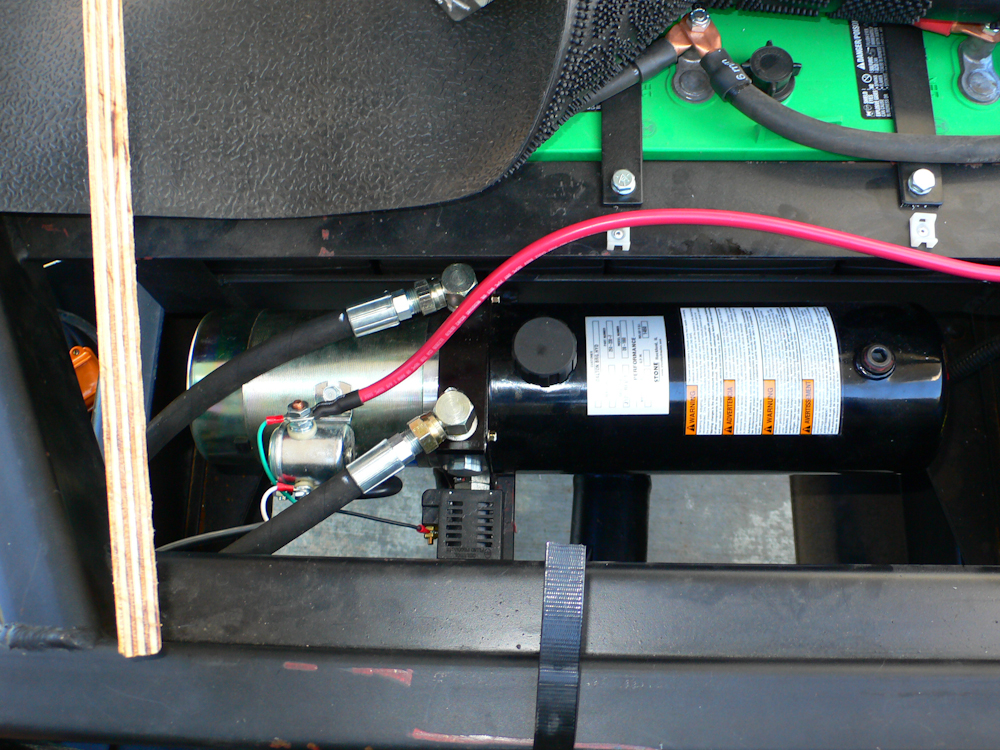
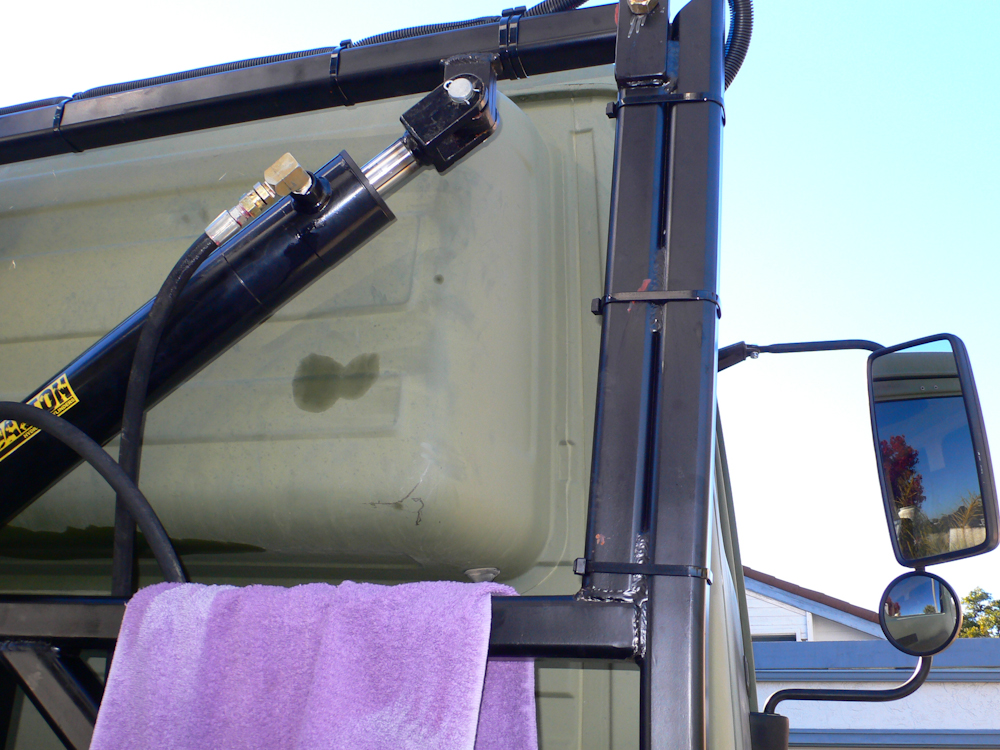
The
hydraulic pump was installed in the mounting frame that Rob had built
from my drawings. Once the pump was bolted down, the hydraulic
hoses were routed, connected and the electrical harnesses were
attached. In the photo above, the red cable is the supply line
for the pump motor. The motor control solenoid is visible (the
metal can at the end of the red cable) as is the direction control
solenoid with the small black wire.

Since
we were trey-careful, the installation worked the first try. But,
working does not mean usable. Specifically, like brakes,
hydraulic systems must have the air bled out before they will work
correctly. After calling my buddy Kai, he suggested mechanically
blocking the system and then running it under pressure while having
connections cracked open a bit. Not unlike bleeding a brake
line. Words really cannot describe the scope of the mess that
this created. True to his suggestion, I had the connections
wrapped with rags, so I did not get sprayed. But, my driveway was
not so lucky. At least a liter of ATF (used as the working fluid)
was lost on the concrete. In the end, this method did not
work. What we finally did, also at Kai's suggestion, was to
remove the cylinder and get the entire assembly below the pump.
Then, we cycled the cylinder several times and the system auto-vented
back into the pump. This only worked because we insured that all
paths forced the air up the hose to the pump. After several
cycles, the cylinder was operating strong without any recoil due to air
bubbles. But, there was another issue. The motor used in
this pump assembly will coast a bit after the current is removed.
The direction control solenoid has no coast: when the current is
removed, the solenoid closes. This curious set of circumstances
resulted in an interesting "whiplash" in the end of the crane boom when
ending a retraction operation. Taken by itself this is visually
interesting, but not a problem. Put a 500 pound load on the
end of 10 feet of extended wire rope and then it becomes a flail.
I needed to do something about this issue.
To
get a better feel for the problem, we extended and retracted the crane
boom. What I noted was that when the boom was extending (away
from the truck) the coast of the motor was benign. You had to
plan ahead, of course, but other than that, no problem.
Retracting the boom was when the whiplash came into play. After a
number of postulated hypotheses, and tests to confirm our conjectures,
we concluded that the real issue was that the control dongle switch had
some kind of issue. I took the switch apart and was able to
convince myself that we could work around the issue. So rather
that stall the whole assembly process, we marched on running wires and
getting them attached to the headboard and frame on their path back to
the control board.
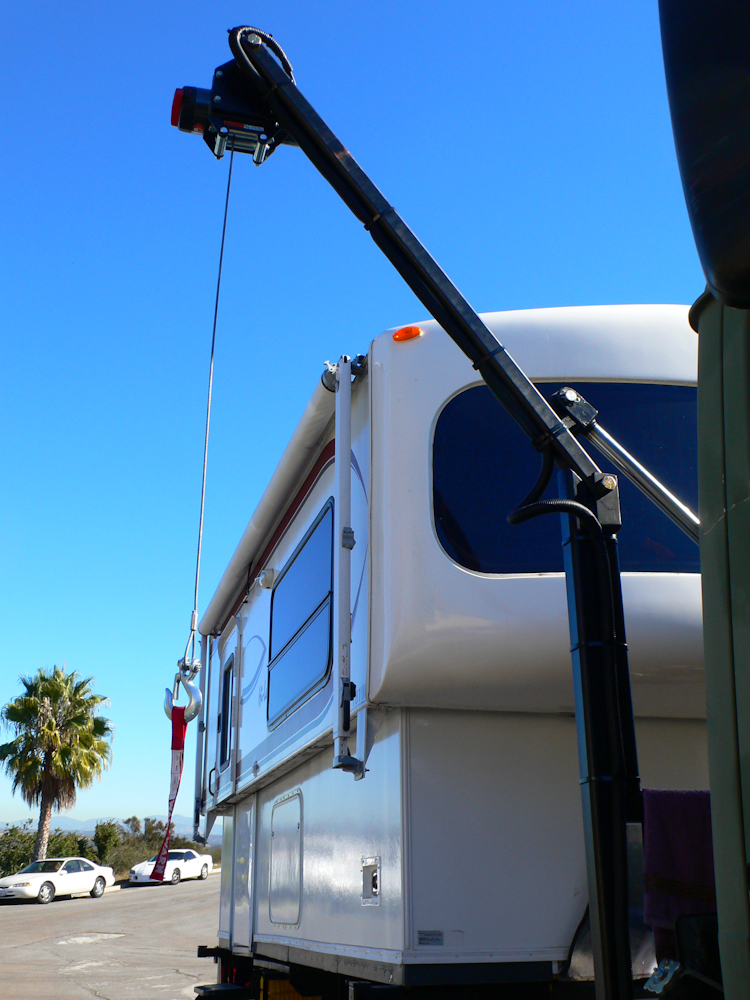
Once
I got all the wiring in place and the connections for the winch in
place, we tested that as well. The winch performed as expected
and we even raised an XM47 tire/wheel combination (about 350 pounds) to
convince ourselves that the assembly would perform as expected.
Of course, to do these tests required me to bypass the balky parts of
the control dongle with a short wire. But, bypass wire
notwithstanding, I was satisfied with the results.
The
entire control board was attached to the camper under the floor as a
temporary setup pending delivery of our tool boxes.
After
the control board was mounted, it was time to attack the switch issues
in earnest. Unbeknownst to me, during the final wiring of the
winch control mechanism, a small bit of stripped insulation had fallen
into the control dongle switch box. When I ran an experiment, the
insulation rolled under the switch connection and prevented it from
disconnecting! Stated differently, when I pushed the button to
engage the pump, the pump continued running even after I removed my
finger from the button. It took a 1/2 a second to realize that
there was a serious issue here and another 1/2 second to reach for the
shorting wire. But, by then, the ram had hit the stop and was
powering on no matter what. I engaged the shorting wire and
caused the cylinder to fully retract, but then had to run around the
truck to the opposite side to turn off the power. As you can see
above, the ram did bend the frame a bit, but it can be bent back.
My
response to this interesting, and wholly unanticipated, failure was
several fold. First, the control dongle I purchased would be
pulled out of the circuit and replaced with a unified controller with
several interlocks. Second, an overall system enable switch was
installed in the circuit to prevent anything from coming on unless
commanded to do so. The unified controller got around the
whiplash problem by selecting the direction of the hydraulic pump
independent of the motor control. The coasting of the pump motor
as opposed to the instant response of the solenoid was the cause of the
problem. The solution was to no allow the solenoid to change
positions while the motor in motion. Additionally, the controller
also allowed control of the winch from the same dongle. And, both
functions were disabled by the override switch to prevent the assembly
from engaging unintentionally. In the photo above, the override
switch is in the blue enclosure.
In the process of doing these actions, I got further educated about dealing with online vendors. I did find the inverter/charger unit that I was seeking, but it was quite pricey (about $1K). So, I shopped around and found on for several hundred dollars less from a marine supply store (name withheld). I ordered the unit, but soon realized that the low prices were due to the fact that they never kept any inventory; they just had the unit shipped straight from the factory. So, what should have been a week delivery took 3 weeks. Then, when the unit finally arrived, it was damaged. So, I photographed the damage, contacted the vendor and they stated it would be resolved. UPS did arrived to inspect the package and take it back. In a week and a half, another box came via UPS. It was the same box, with the same damaged components. After several phone calls to unhelpful folks and a few increasingly angry emails, I was able to get an RMA number and return the goods (again).
I have still not obtained my refund, but I am casually optimistic. Only time will tell, but I can assure you that given all the effort I have put into this acquisition, and the cost, they will refund my money or face me in small claims court. Meanwhile, I still do not have my inverter and will likely not take any action until the refund issue resolves itself one way or the other.
Next: 24V -> 12V
conversion for cab electronics and internal camper wiring.
| Previous Adventure | ||
| Trip Home Page |
Photos and Text Copyright Bill Caid 2010, all rights
reserved.
For your enjoyment only, not for commercial use.