Task Report 20100101-20100310
Our trip to Alaska revealed that there were some pretty important maintenance and repair actions that needed to be accomplished to keep the rig running in top-notch form. We had experienced a few issues that had to be addressed, and since I was "in the mood", we decided to perform some upgrades that would increase our enjoyment of the truck on future expeditions.
The photos below are what we saw.
Because the radiator on the 1300 (and all SBUs in general) are offset, there is a somewhat hokey system of belts and pulleys that deliver engine power to the fan. The first belt goes from the crankshaft to a transfer pulley that is attached to the corner of the radiator. That pulley is hooked to a shaft and bearing set that transfers motion to another pulley that is hooked to the actual fan via a second belt. The fan pulley, and its associated bearings have never been serviced during the 15 years that I have owned the truck and the whole system was a tad noisy, so I decided to replace the entire thing. So, we started at the water pump and replaced it as well as the thermostat and all the hoses. Then, we pulled the radiator and the entire transfer pulley system. The entire setup was a press-fit and during my somewhat ham-handed disassembly, I broke the fan pulley.
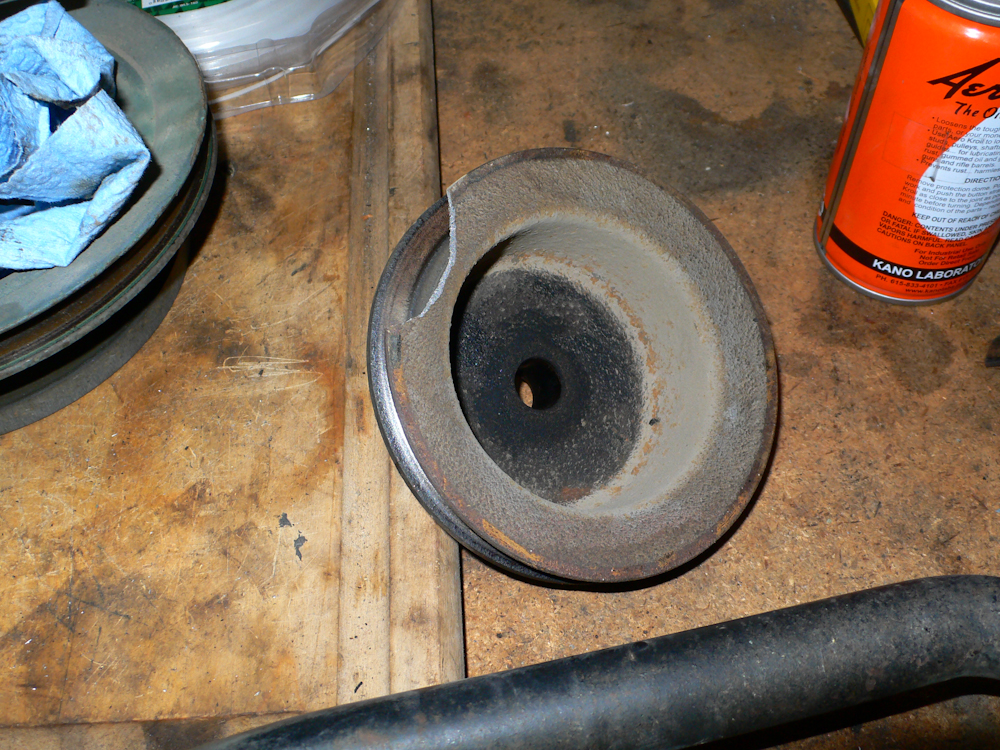
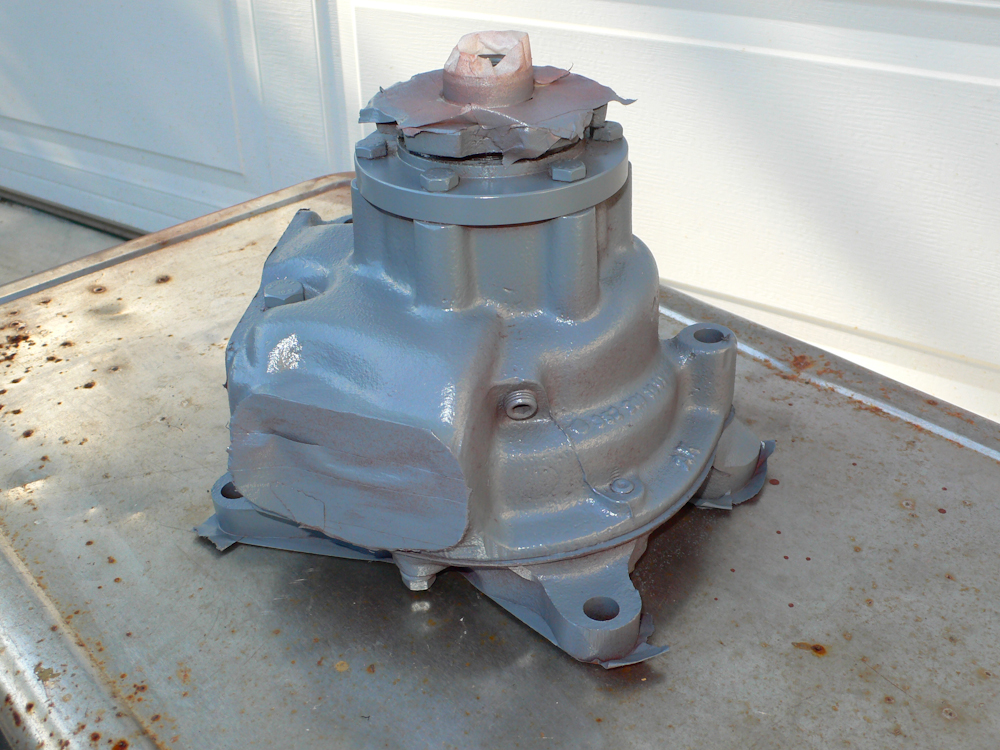
The fan pulley attached to the back end of this assembly and the fan blades bolted onto the front face. There is a bearing pack that is pressed into that frame that I could not get out using a conventional attack, so I asked Kai to use his multi-ton hydraulic press on it and it did come out, albeit with substantial difficulty.
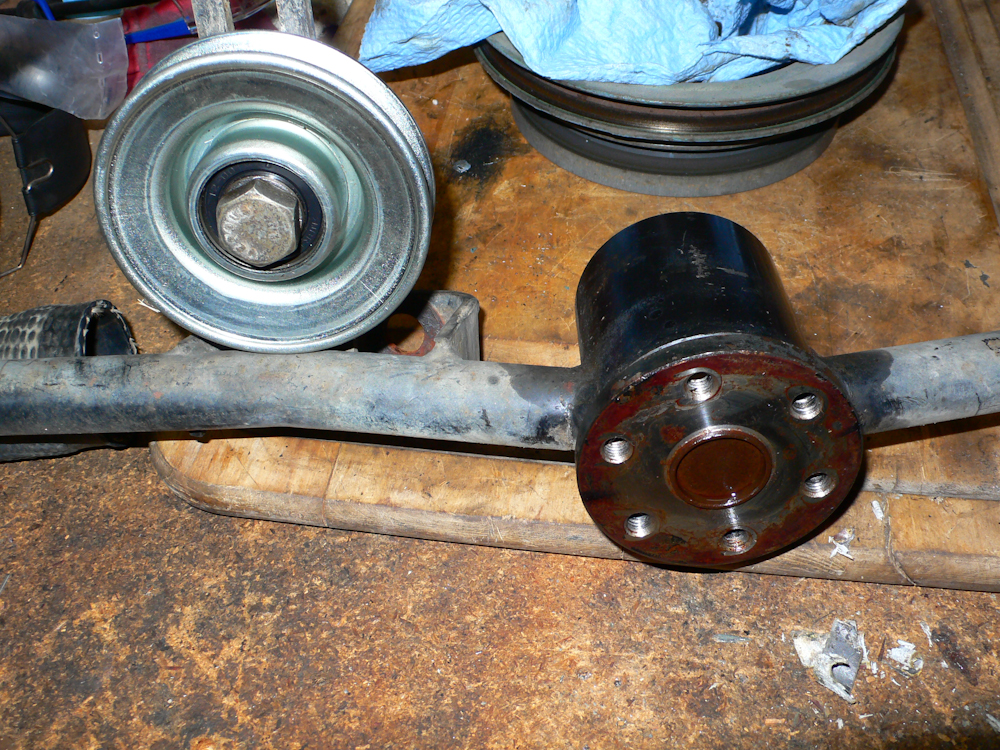
This is the transfer pulley after I replaced both bearing packs in it and replaced the idler pulley (on the arm) This was a bit tricky, but we did complete the bearing swap without outside help.

This is the new bearing pack that was installed in the fan pulley frame. This is a big bearing set and was quite pricey (as are most mog parts).
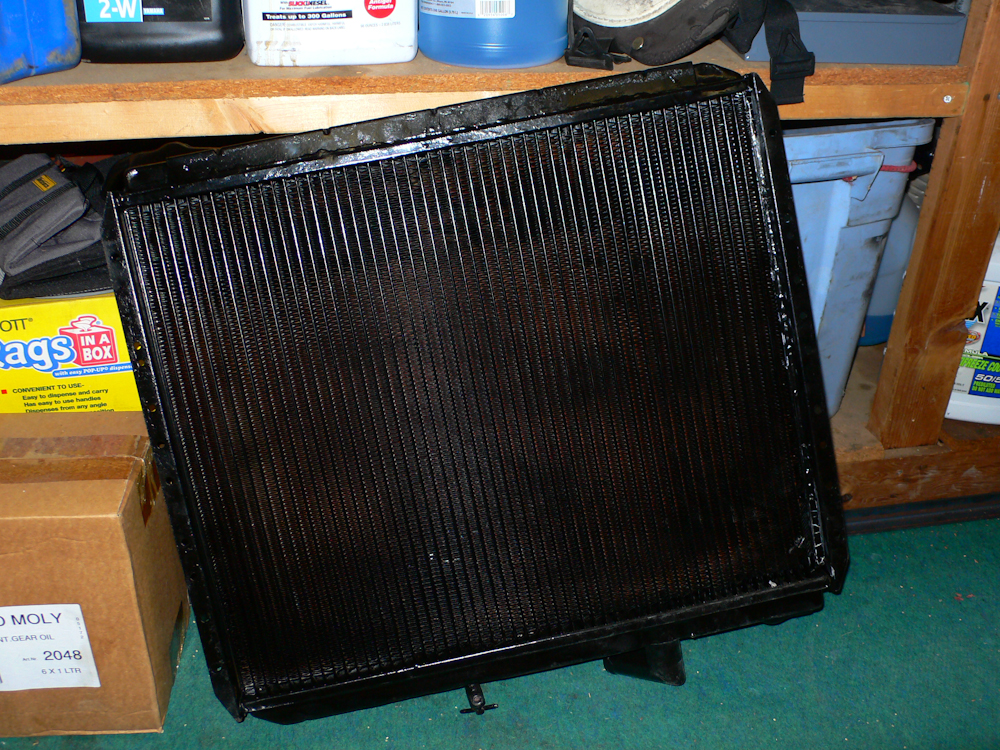
The radiator was last serviced in 1996 or so. It was time to do it again as it had developed a leak in northern Yukon, but we were able to stop it with some Alumaseal radiator sealant. The sealant worked well and did not seem to cause side effects. The radiator was re-cored, resoldered and pressure tested. The price was about $600; less than 1/2 the cost of a new one. During the reassembly of the radiator, I discovered a big crack in the fan cowling that would need a splint. More on that later.
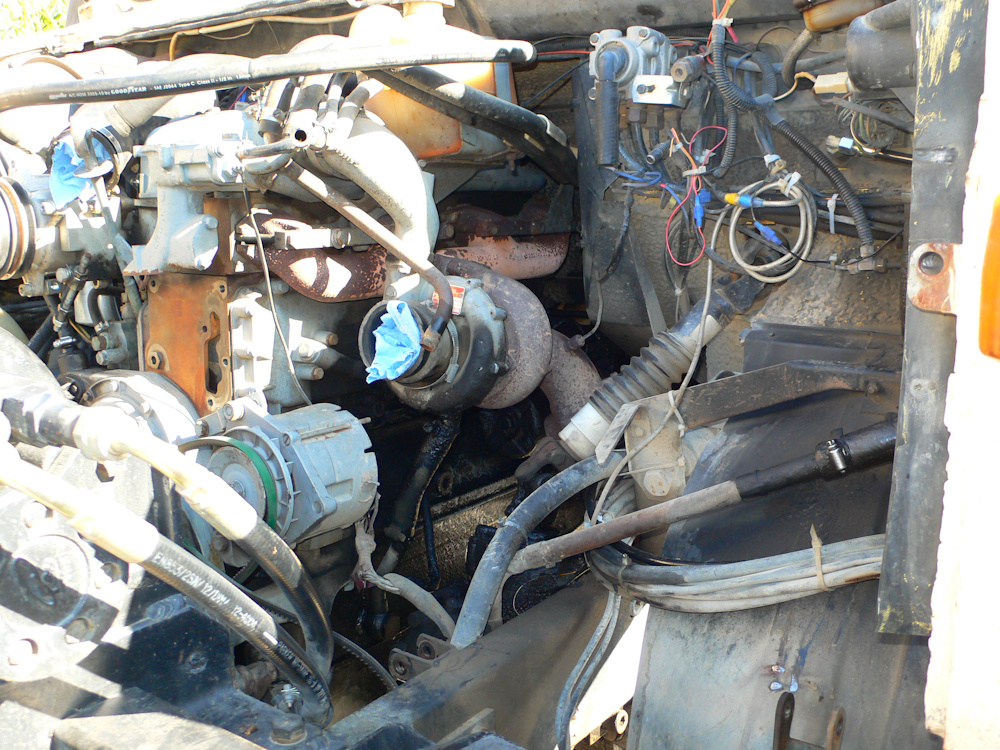
Removal of all the plumbing left a big, gaping hole in the front of the truck. I attempted to service a few other components while the thing was apart and succeed at several, but it was not a clean sweep. Note that the water pump is removed in the photo above.
I primed a painted the new water pump before installation.
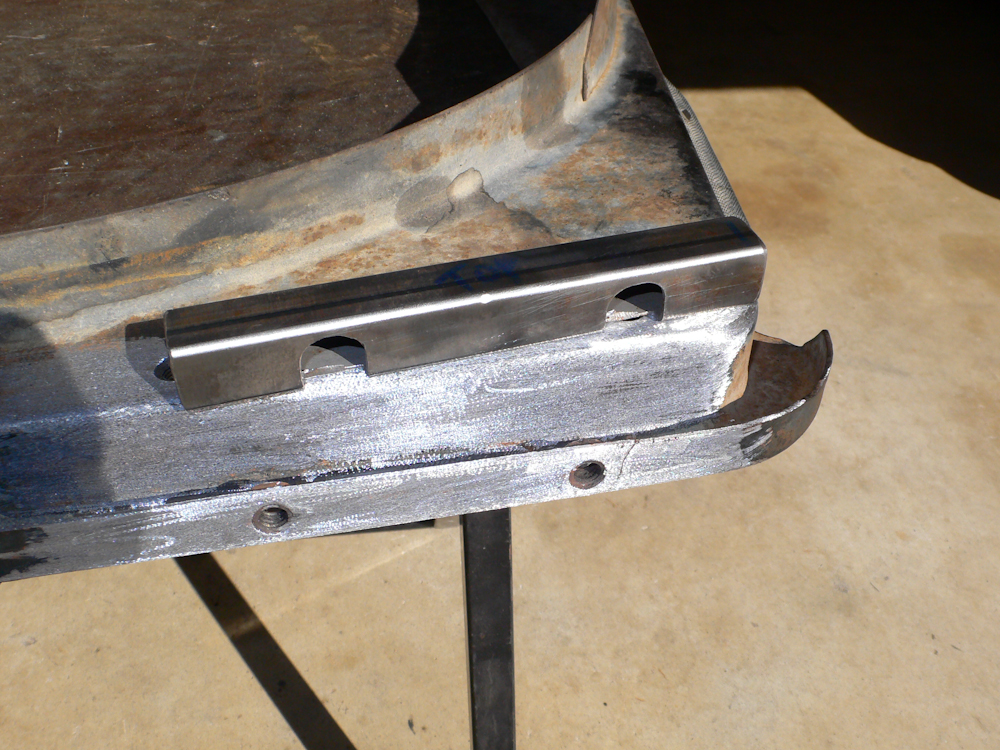
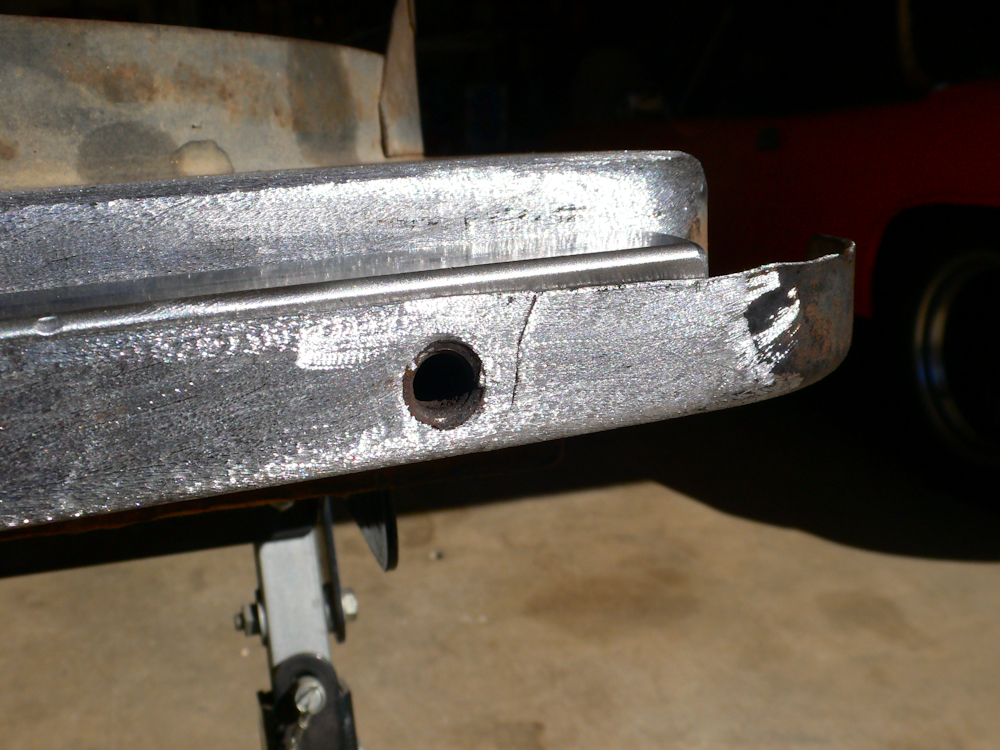
As I was preparing to reassemble the radiator and cowling, I discovered a big stress crack at the junction of the cowling and the transfer pulley. Note the crack to the right of the right bolt hole in the photo above. This was going to require some careful welding, so I solicited the help of Mark Mitchell and his TIG welder. The photo above shows the splint that will be added into the trough behind the bolts. Note that the square tubing has been milled out to provide clearance for the existing transfer pulley attachment bolts.
The splint is in place, but not yet welded. Note the crack is right next to where the transfer pulley attaches.
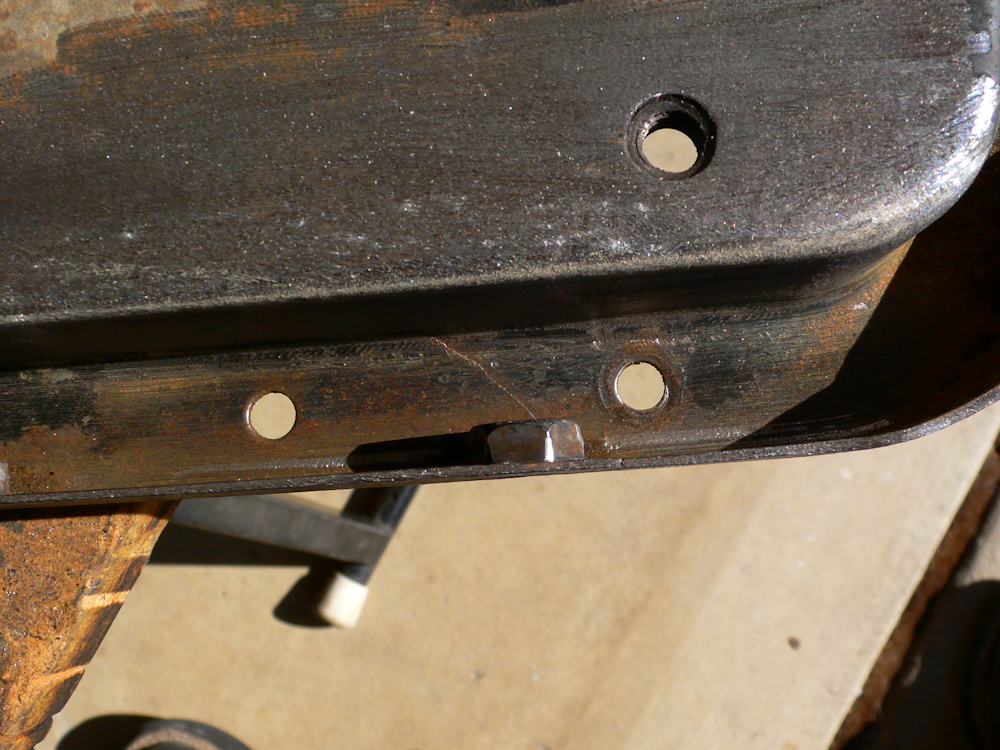
The crack is quite long and would have likely resulted in a full fan and radiator failure. Given my luck, it would have happened someplace very inconvenient, so I am glad that I saw it before it fully failed.
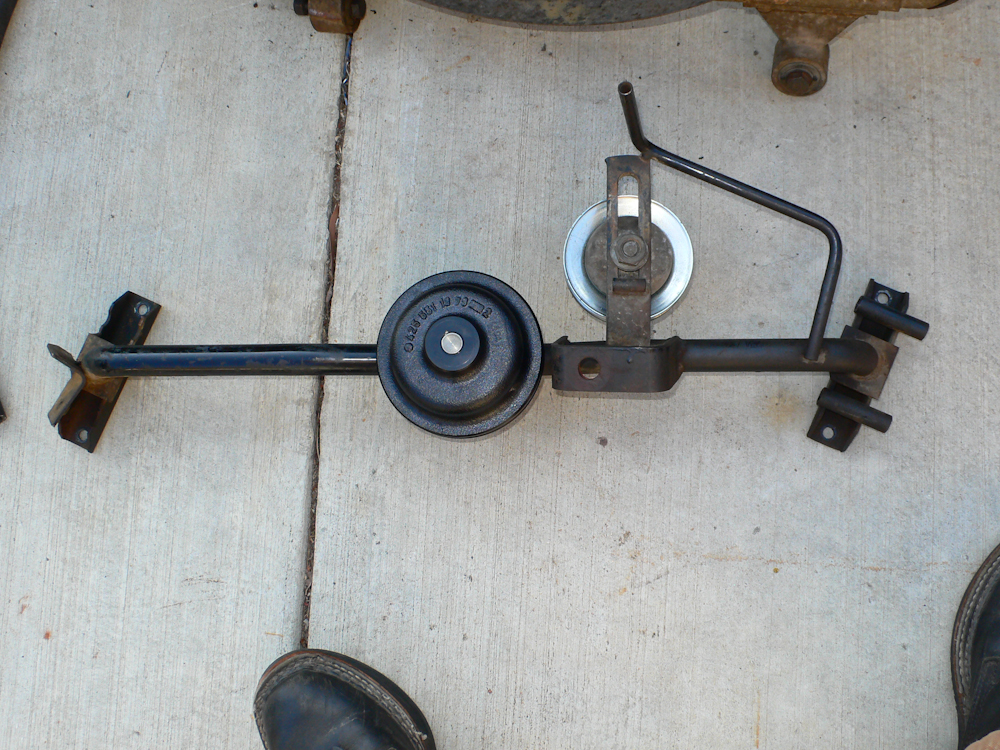
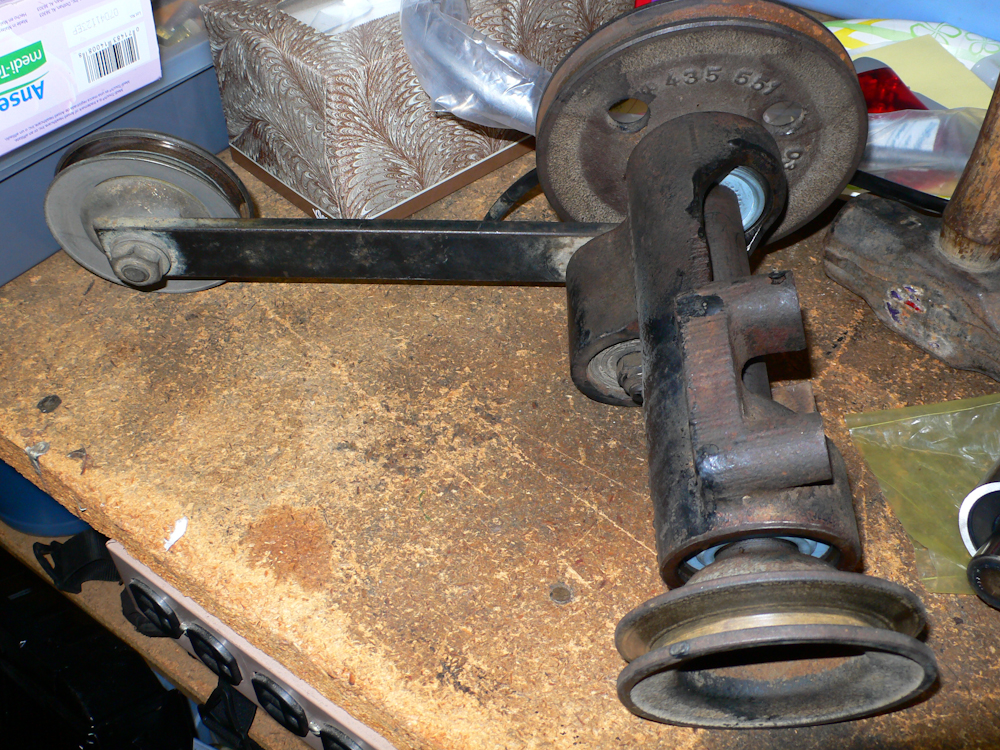
The fan pulley support assembly with new pulley, bearings and a new idler pulley. This assembly hooks to the back of the fan cowling and the 2 bosses on the right bolt onto the transfer pulley assembly. The balance of the actions on the radiator were time consuming and inconvenient, but were completed successfully without incident.
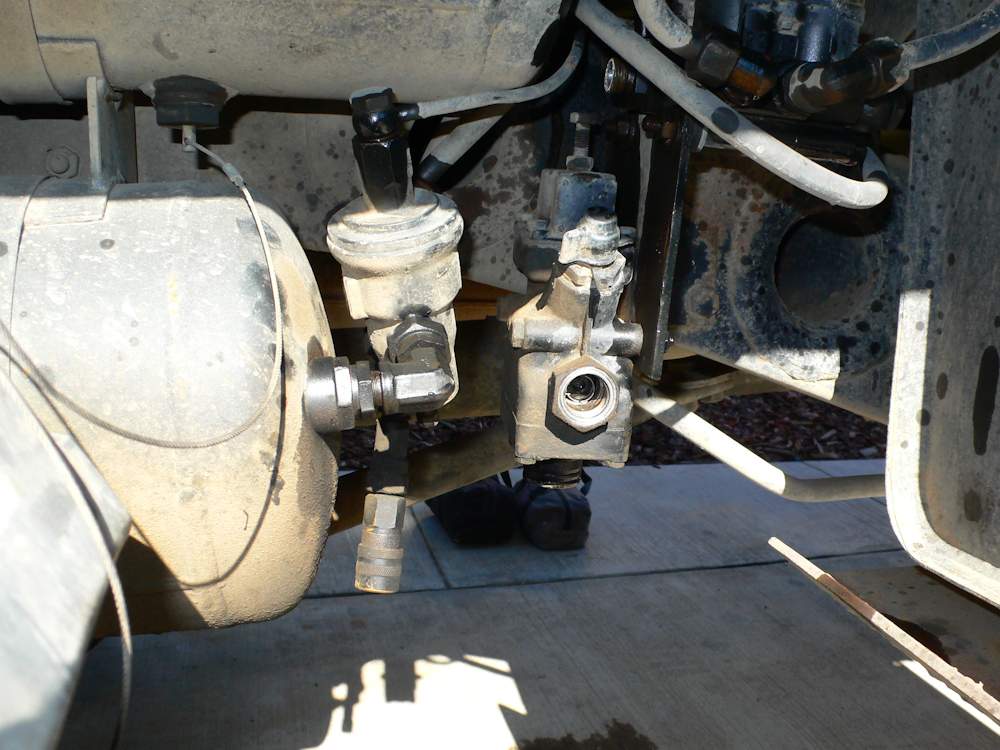
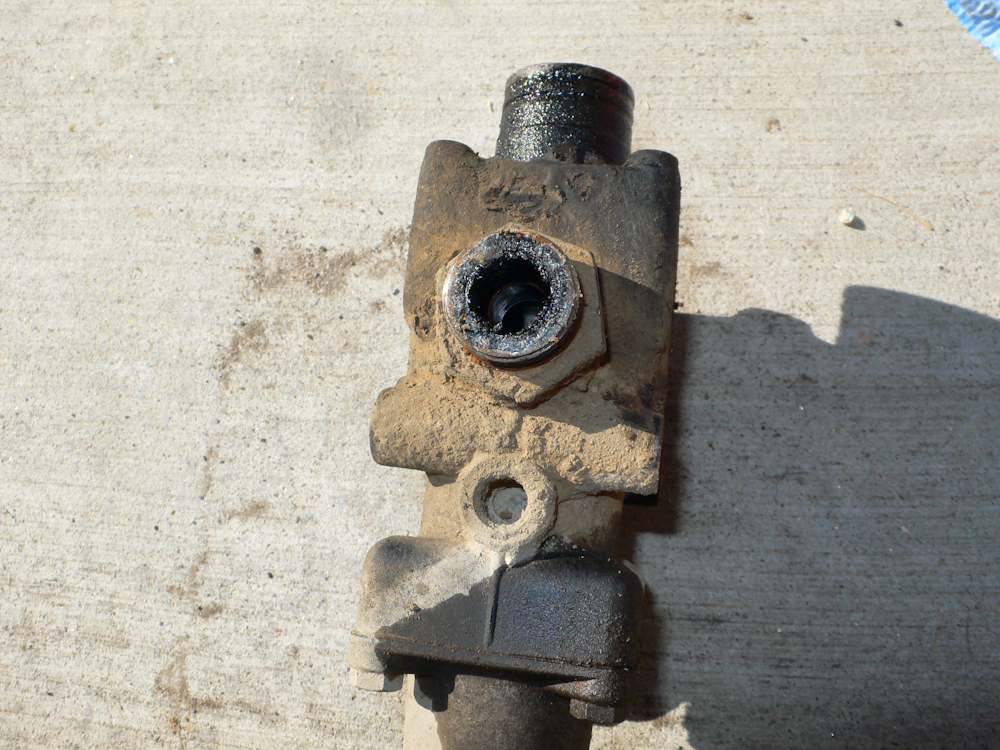
Once we were finished with the radiator, we went on to service the air system. Most of the components in the system are, to the best of my knowledge, original equipment 30 year old parts. I have had recurring issues over the years, usually traced back to rust and contamination in the air system. My conjecture was that the tanks were rusty and most of the other valves and pressure limiters were contaminated with rust and gunk. So, the simplest thing, albeit the most costly and time consuming, was to replace it all. So we did. In the photo above, several lines have been removed showing the exit port for the unloader valve. That guy was totally gunked up.
The air fittings were on tight and require a lot of torque to break loose.
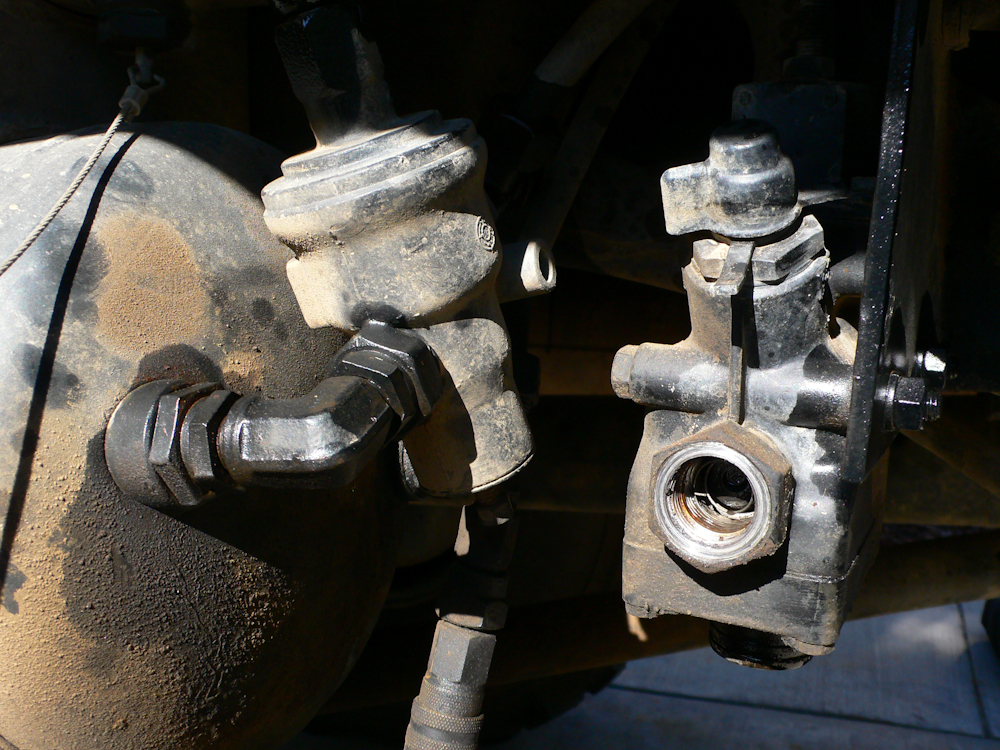
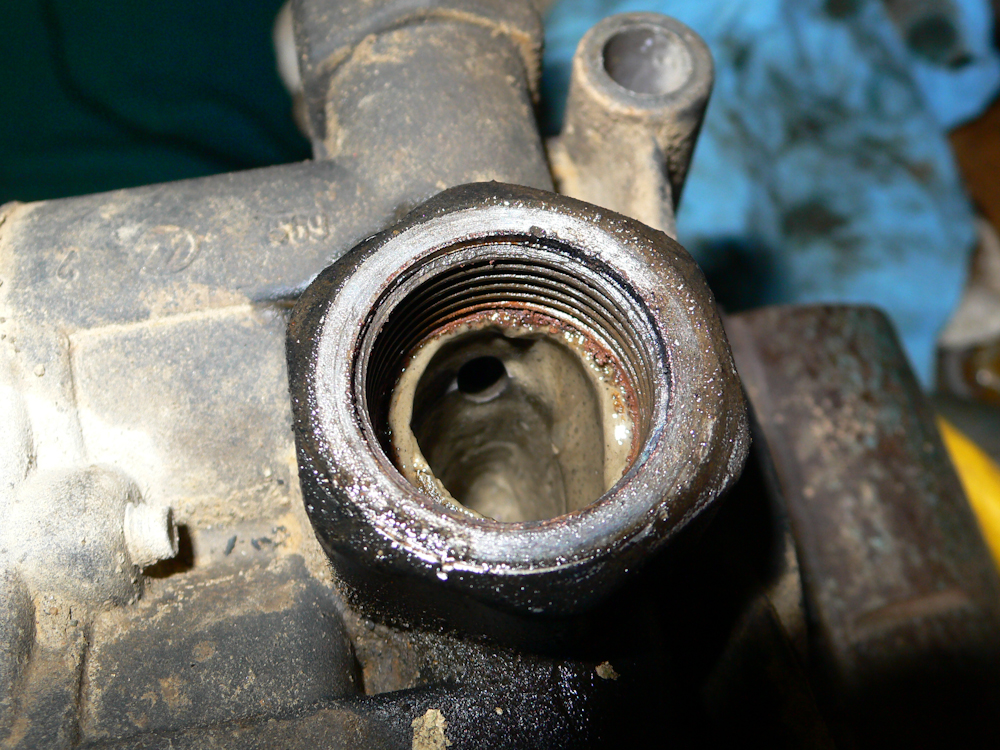
A close up of the unloader valve. You can see some of the gunk inside the main port.
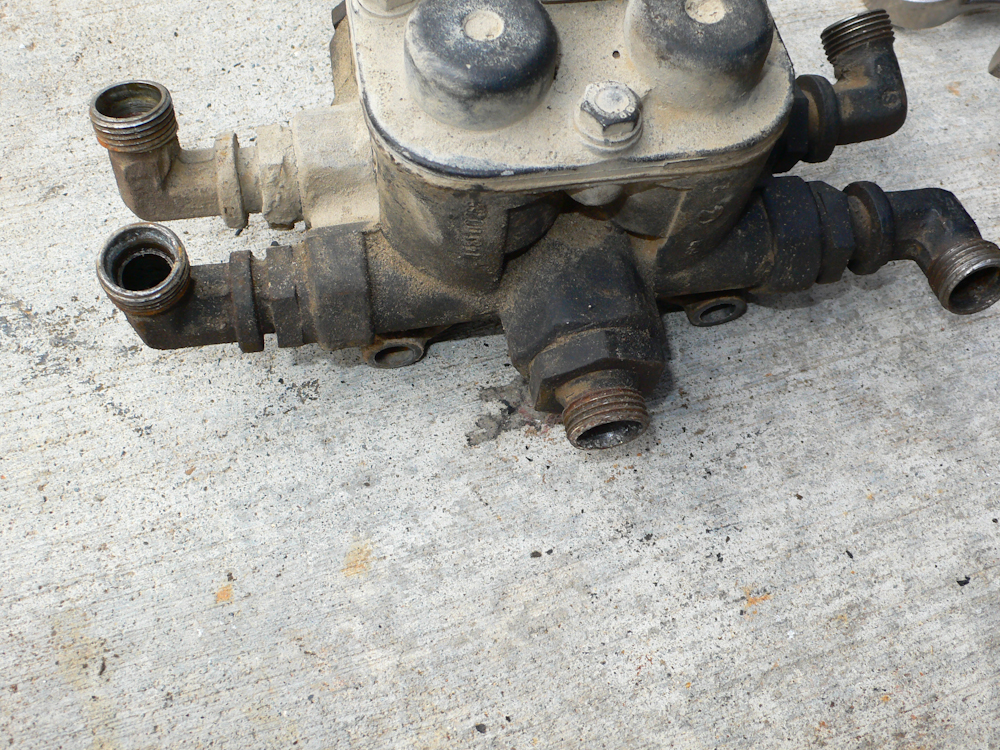
The four-way valve had lots of contamination in the lines as well.
Inside the 4-way you can see a gray oil-water mixture.
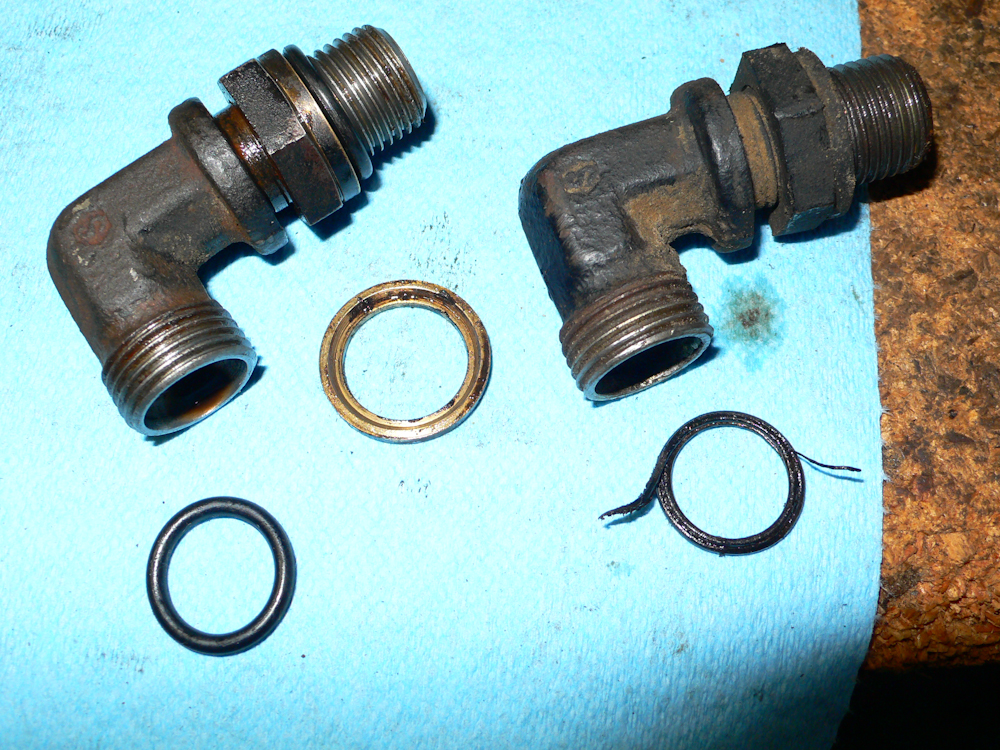
Due to a failure I had while on our Alaskan adventure, I happened to have a big box of metric O rings which served me well in this task. Above, you can see fittings before and after cleanup.
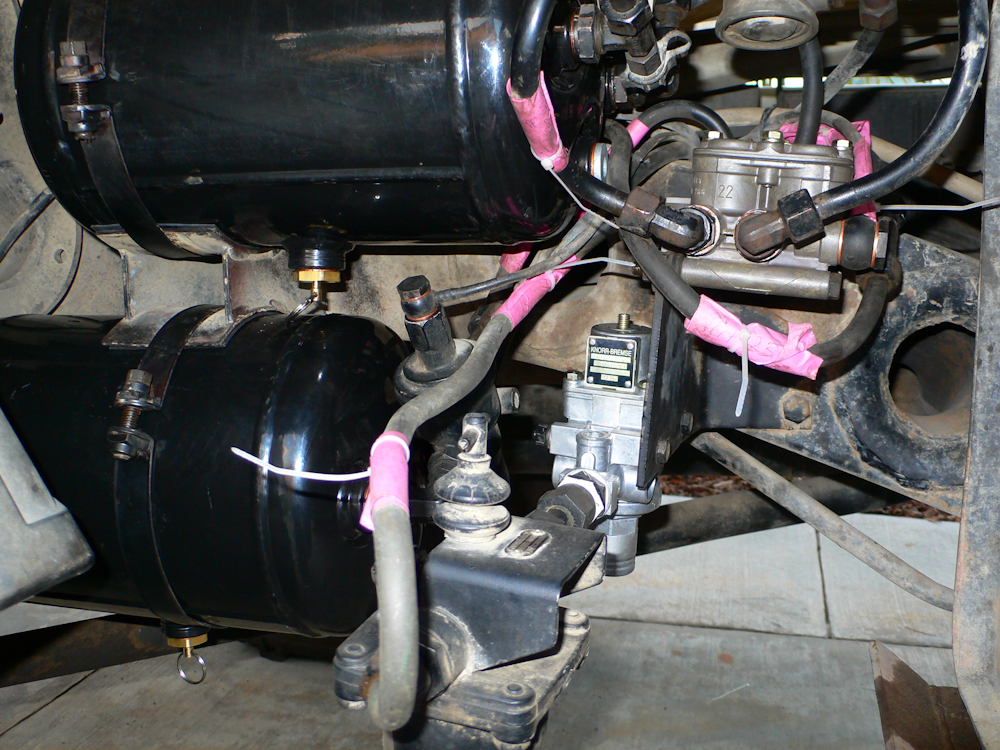
The system was reassembled and tested. Only the alcohol reservoir was retained, everything else was replaced. The pink post-its were my labels to insure I did not get the fittings mixed up.
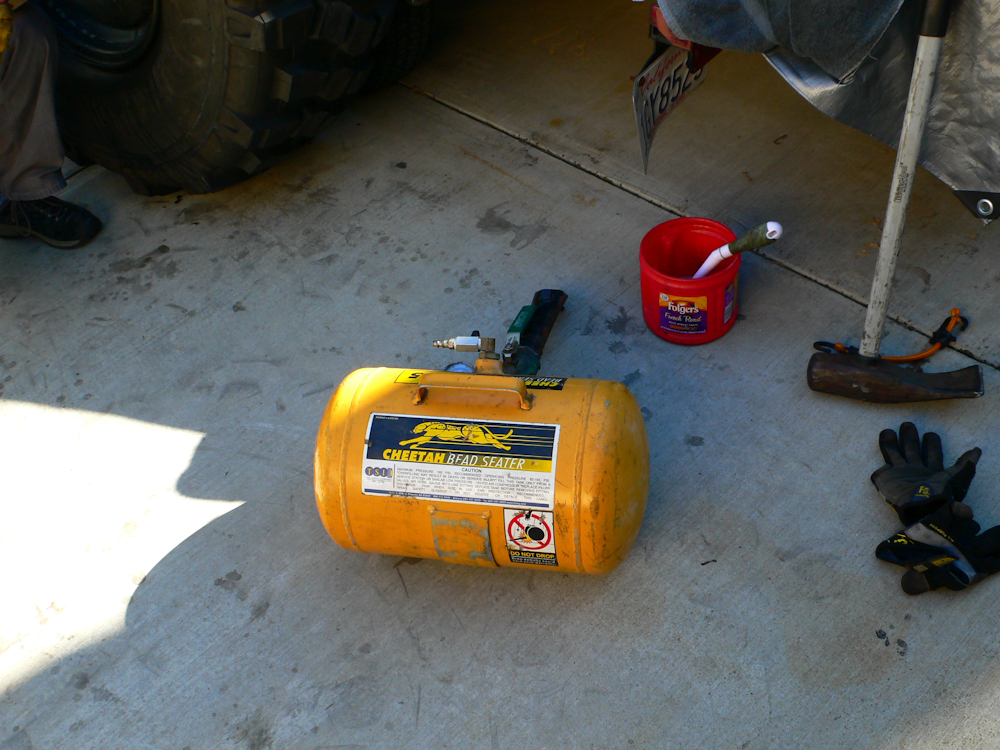
Once the air system was completed, we went on to tires. I managed to score a full set of new ex-military Michelin 395/85R20 XML tires for $1200 delivered, but we had to mount them. We totally wore out the set that was on the truck during our 15K mile trip, so it was time. Kathleen and I did all the work, and it was hard. Dismounting and remounting a set of these brutes is a real workout. But, the most challenging part is getting the beads seated. Last time, we used ether and it worked fine. This time, for whatever reason, we had much less luck. So, we borrowed Dan Johnson's Cheetah seater. Basically, it is an air cannon. You pump it up and when it is to full pressure, you put the nozzle in the crack between the tire and the rim and rapidly open the valve. There is quite a lot of skill required and if you are not braced it will knock you down. Ask me how I know.
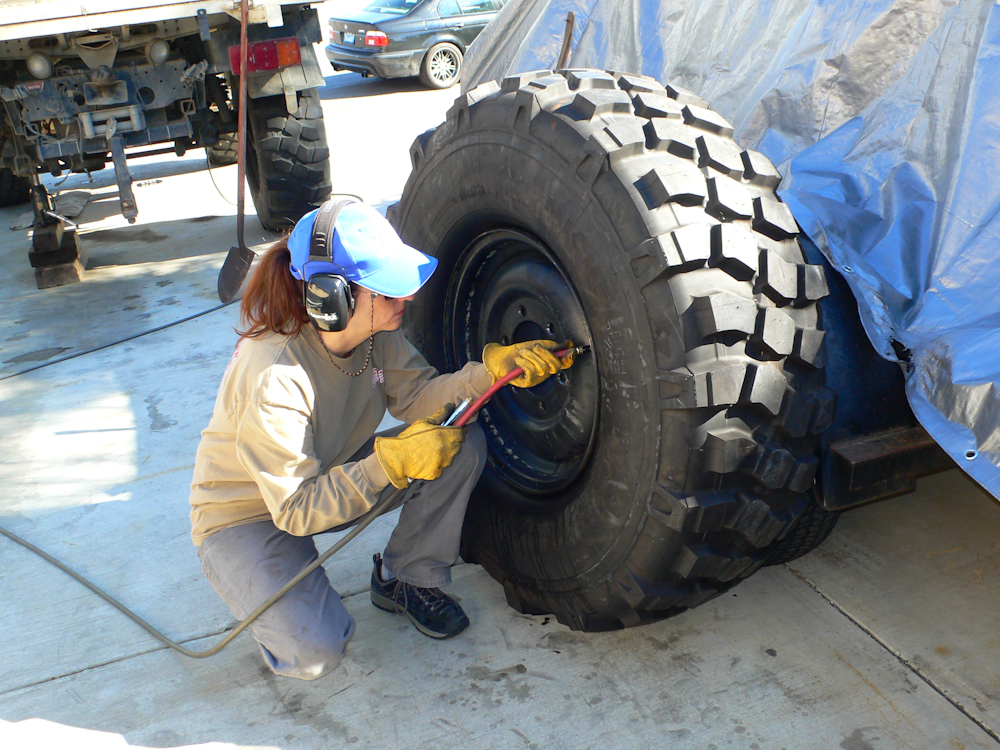
Kathleen fills the tire to operating pressure after the bead was seated. Look carefully to the right of the tire and you can see where the ether we used on a previous tire set the tarp on fire.
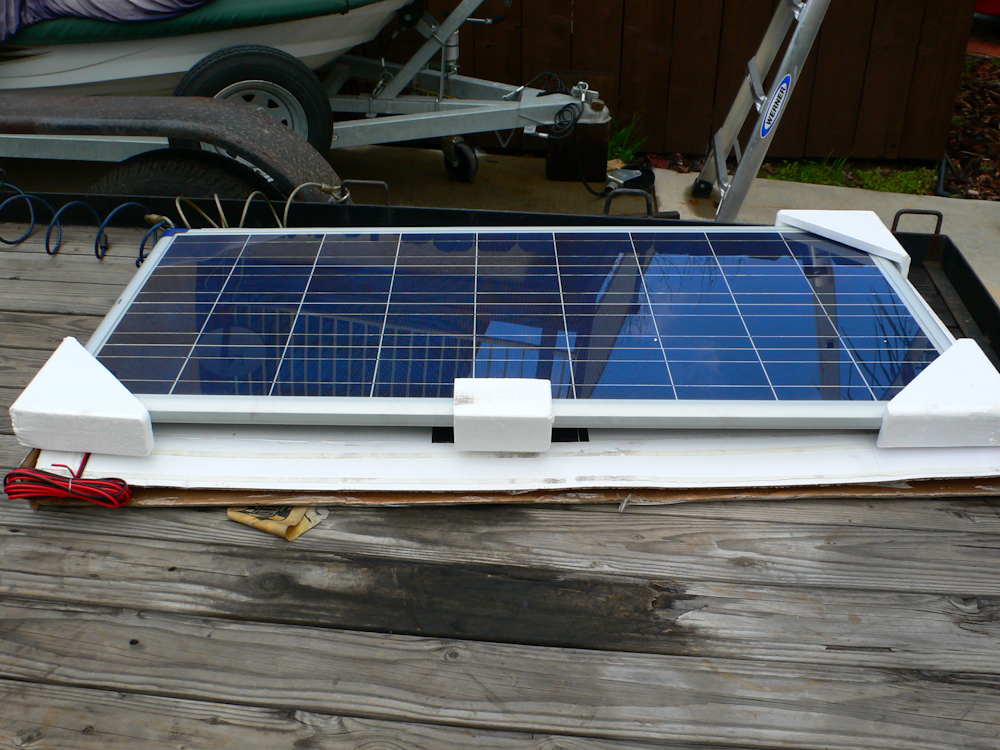
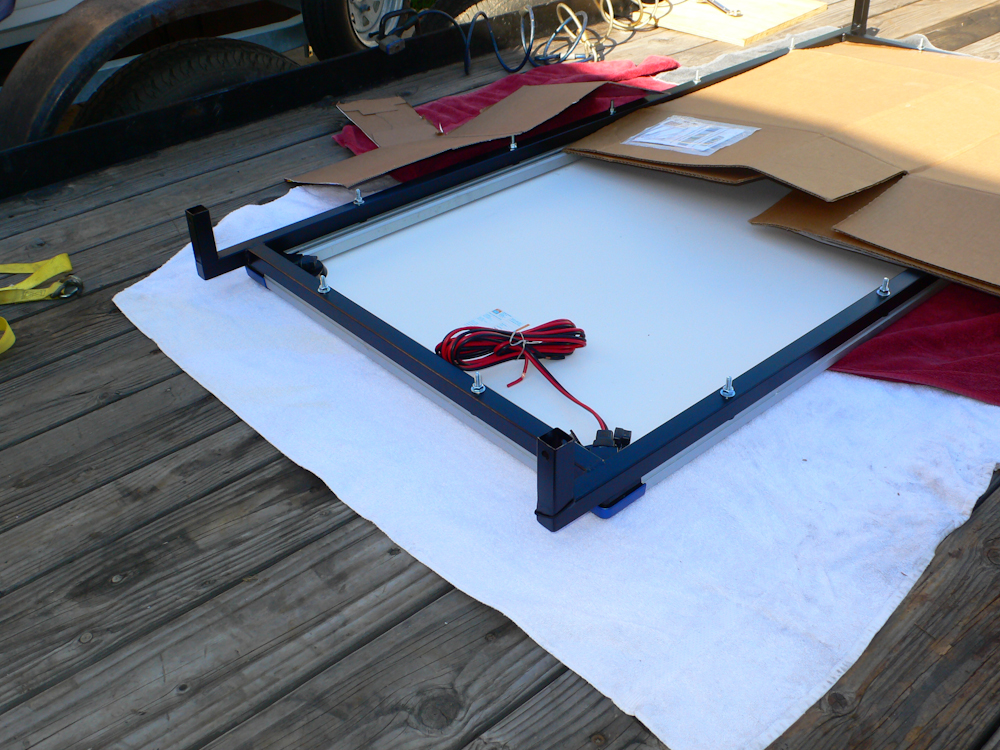
When we completed the tires, we decided to add a 130 watt solar panel. We have discovered that the mog, when operated a low RPM, never generated sufficient current to recharge our 200 amp-hour house battery array. We have a small Honda generator, but that is a hassle as well as noisy. Plus, if you are stationary for several days you MUST run the generator or the batteries will die. Following the lead of our friends Steve and Debra, we added a high power panel. This panel is marine-grade and absent some mechanical trauma, it should last for many years.
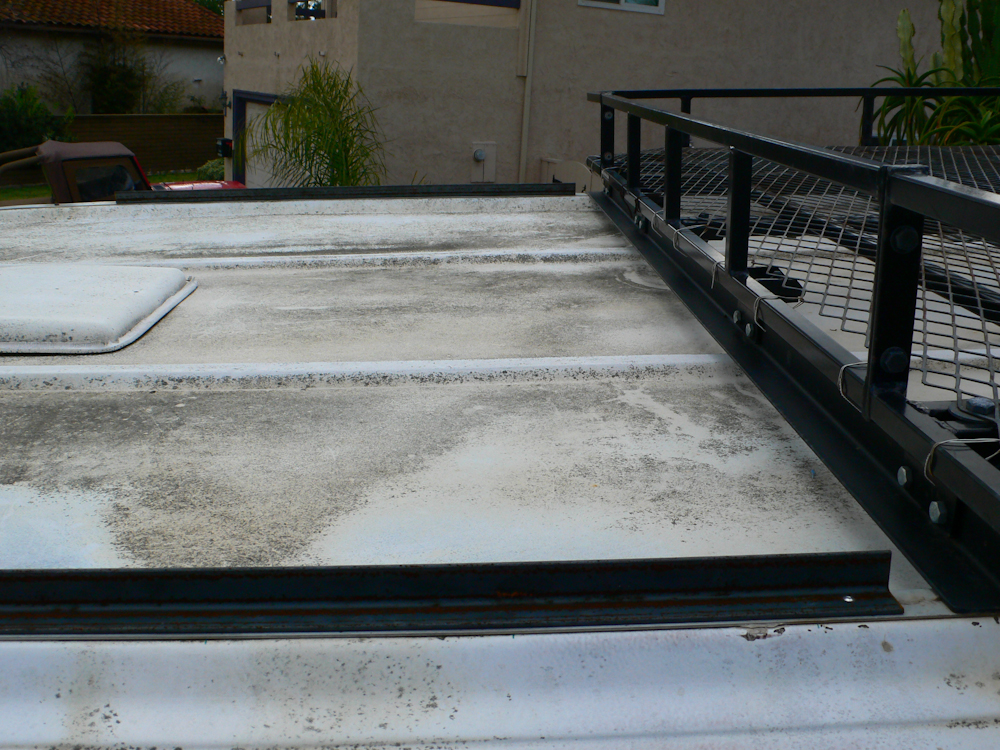
The panel will be mounted to the front of the roof rack using the same basic approach. Each end connects to the camper roof via a piece of angle iron that will be bolted and pop riveted to the skin of the roof. The roof vent forced us to elevate the panel to allow the vent to be opened. After an event in Baja in high winds (estimated to be 90 mph), we were very cognizant of the lifting forces that might be applied to the panel. Thus, we made the frame and mounting extra robust.
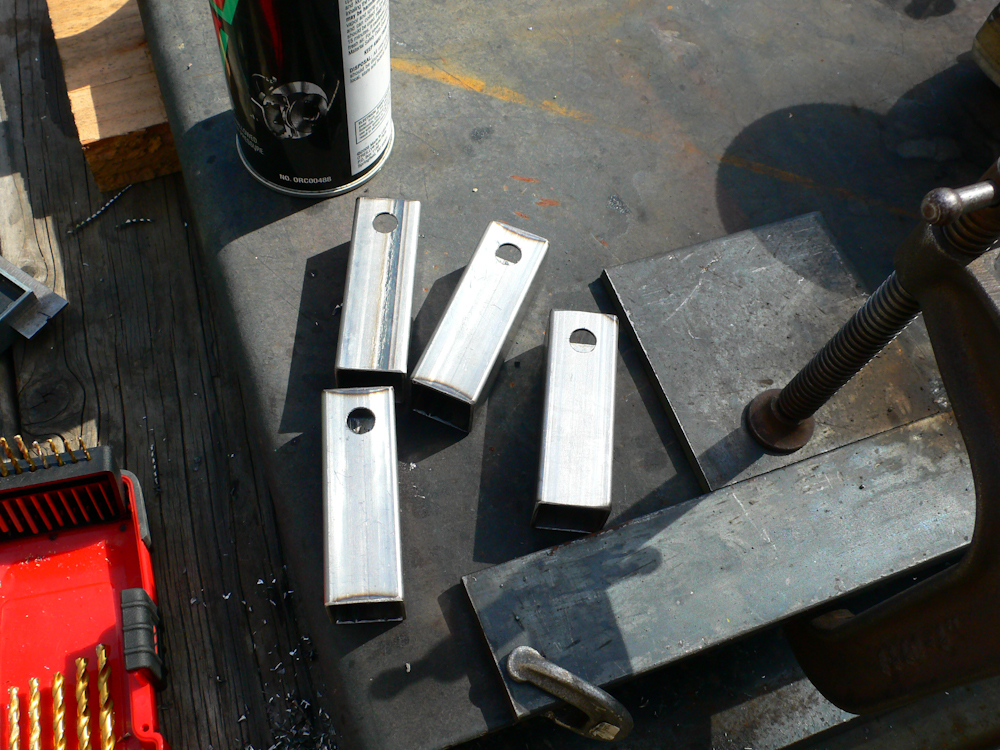
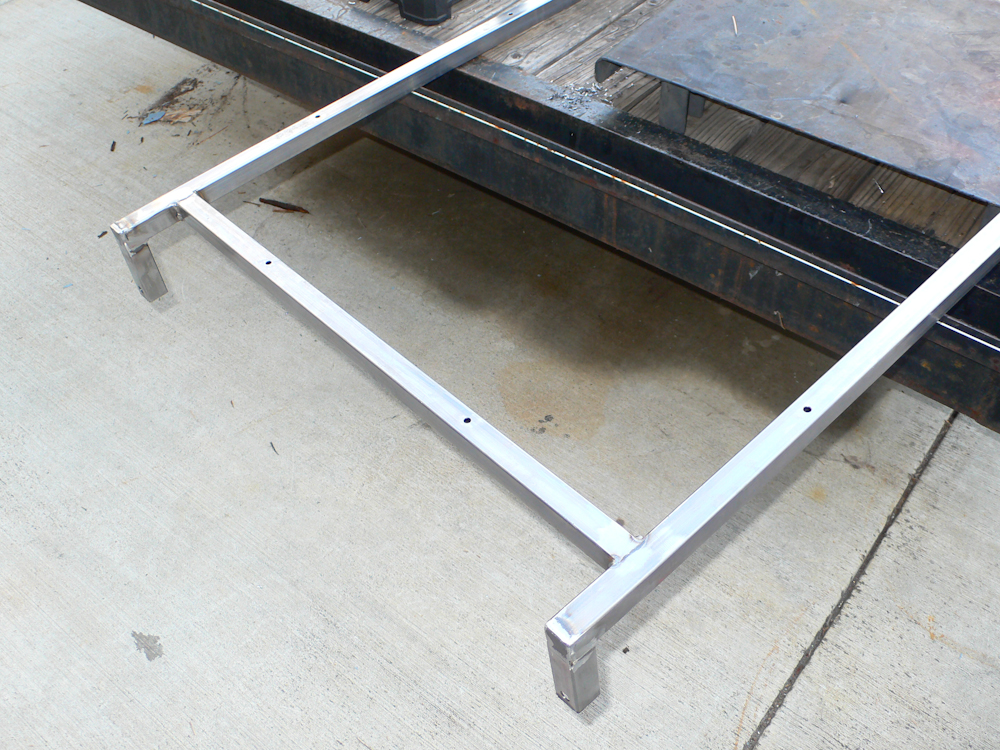
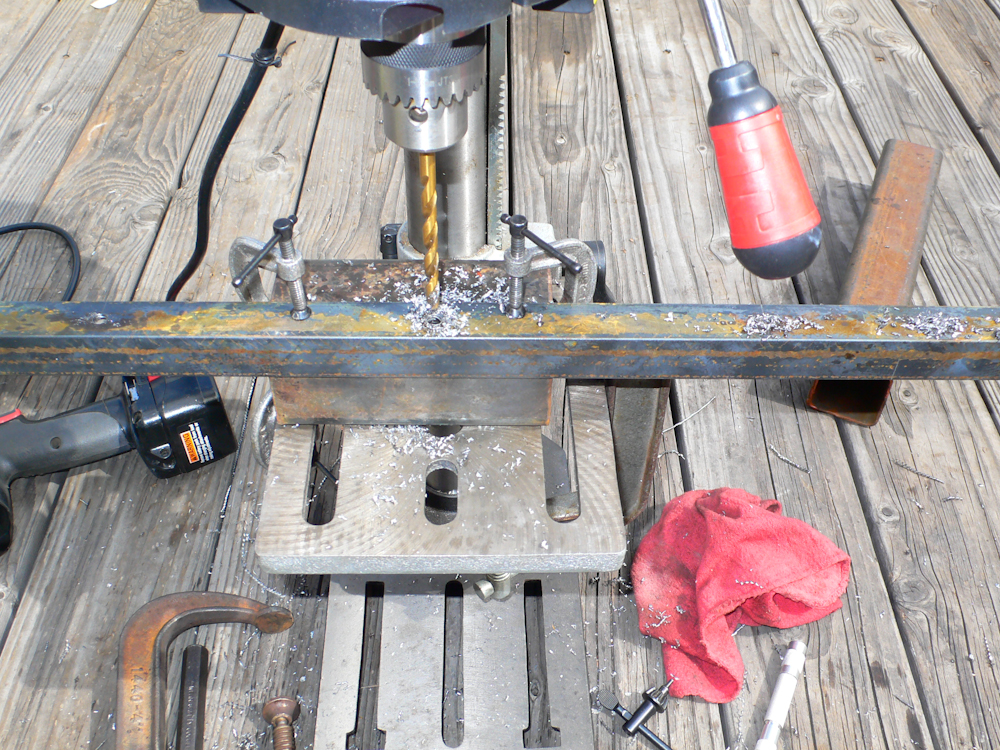
The frame and feet were made from 16 ga square tubing. Above, holes are drilled in the feet to allow connection to the angle iron mounts.
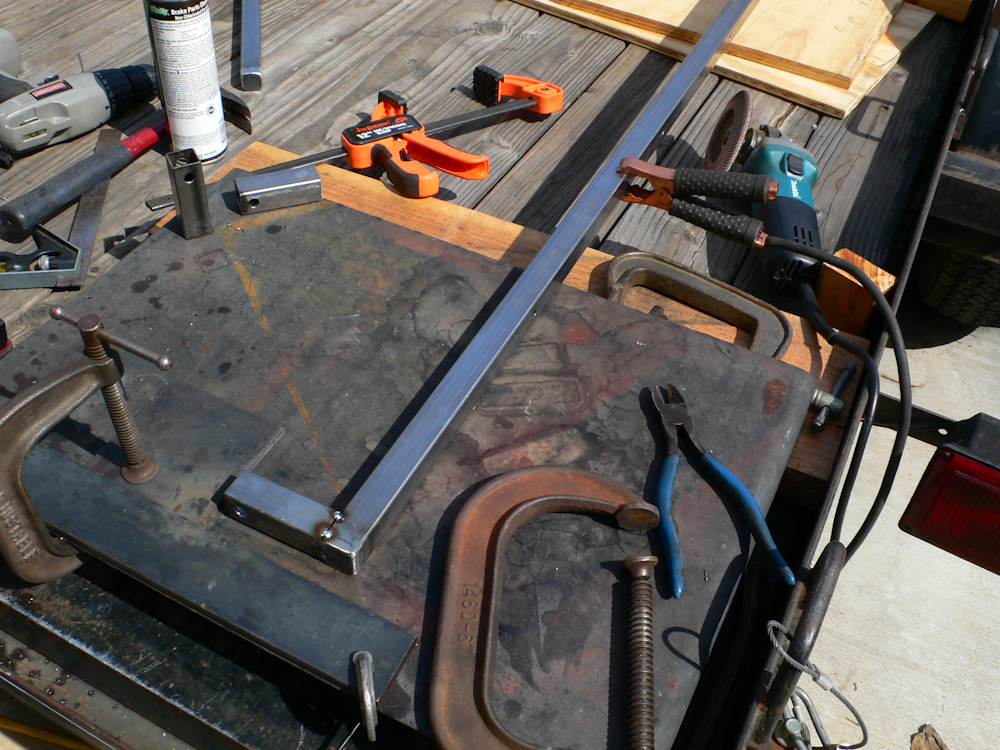
The feet were positioned on the frame ends and tack welded.
Once the feet were determined to be in the correct position, they were securely welded.
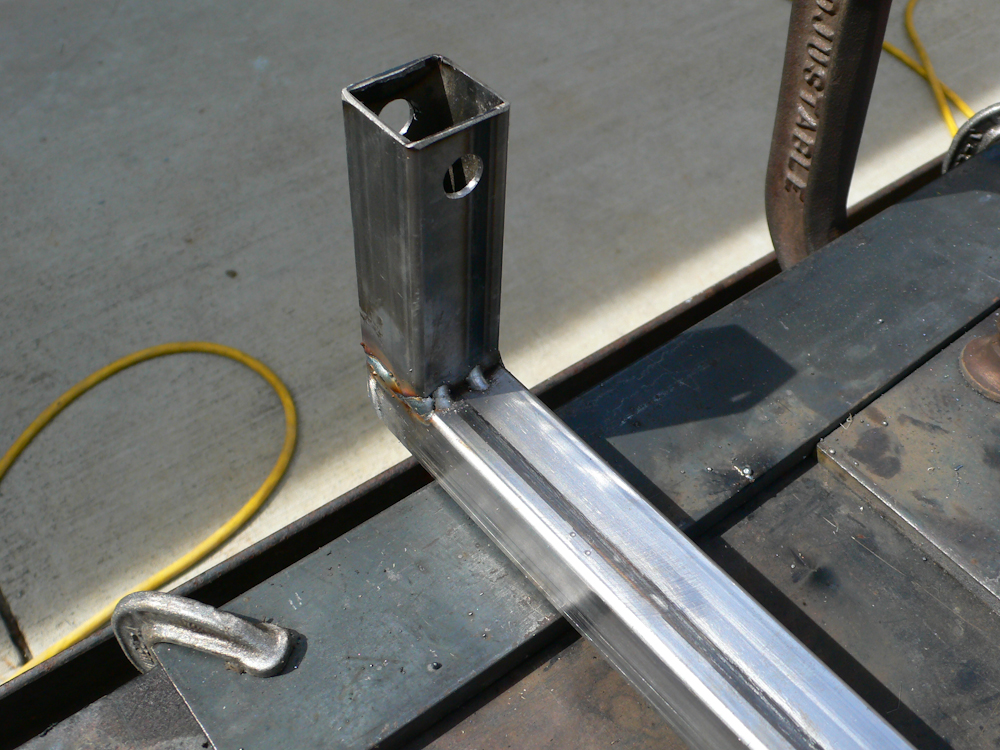
Caps were welded over open ends in the tube and holes were drilled for the panel mounting bolts.
The panel mounting bolts were installed with some thick rubber washers.
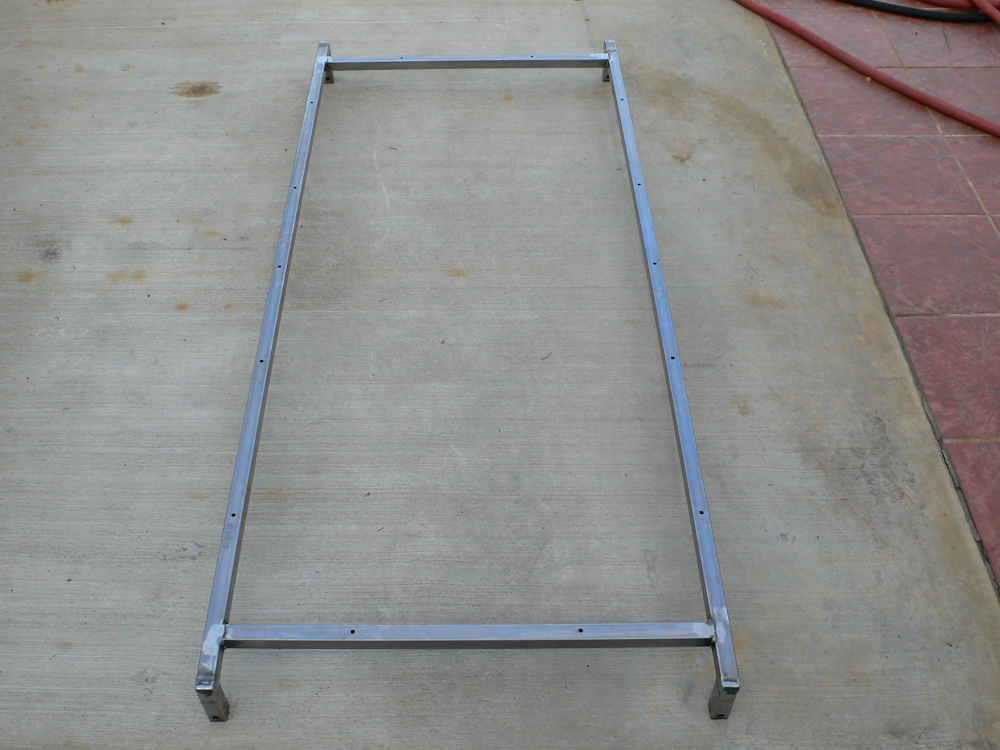
The completed from ready for painting.

The frame in my outdoor paint shop.
Holes were drilled in the angle iron mounts and then these were primed and painted.
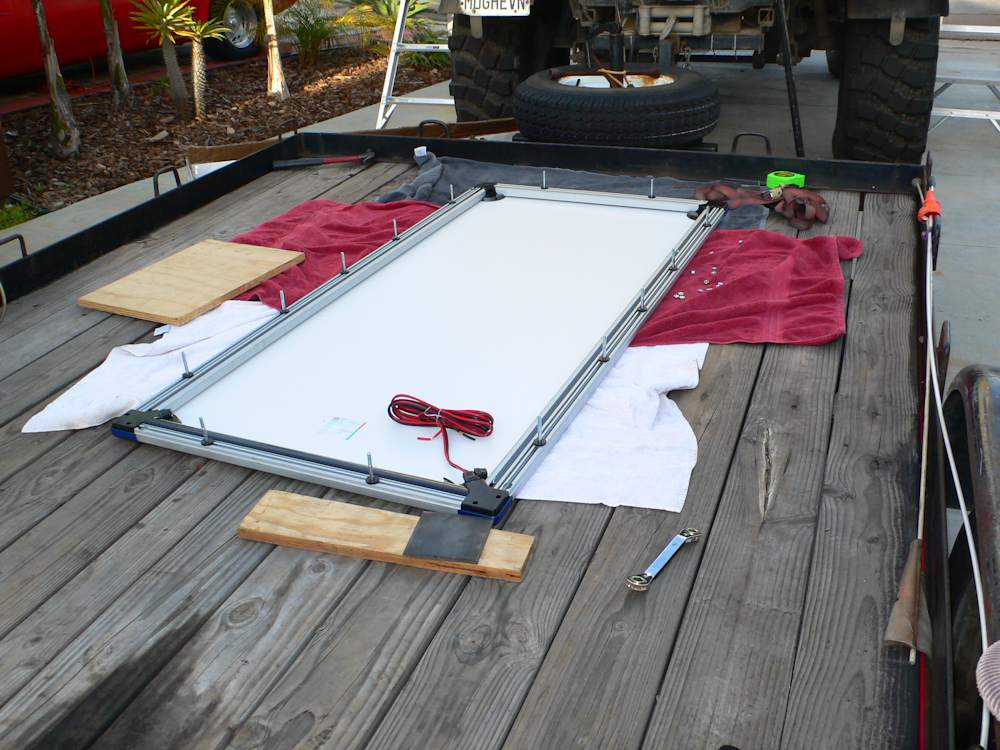
The panel was attached to the frame and some final touch-up painting was done before lifting the assembly to the roof for mounting.
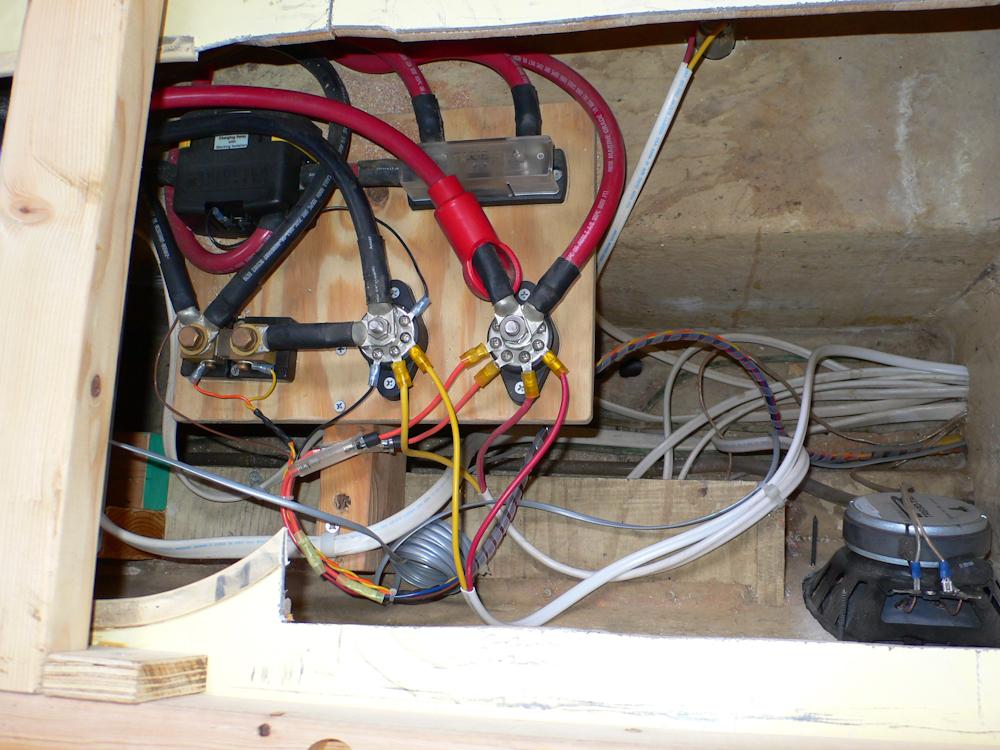
Next came the electrical connections. The solar wiring was attached to the main DC distribution junctions. The initial design was created with an eventual solar connection in mind. The voltage and current sensors for the system correctly handle the panel and any charge added to the battery array is noted by the system.
In addition to running cables, I had to make a mount for the solar charge controller.
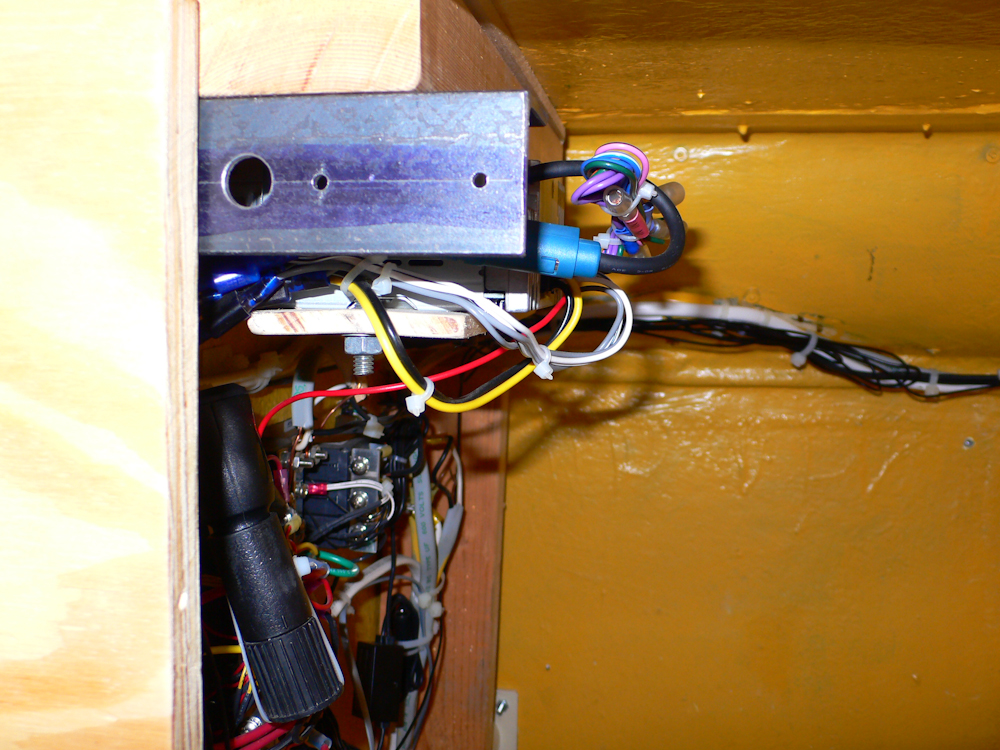
While everything was torn apart, we decided to add an XM satellite radio system as well. Sadly, the XM wiring kit was not RV friendly and all of the clutter is due to that system. I was lucky, however. I was reading a news group about the kit and noted that you MUST use their cigarette lighter setup as part of the wiring. Some other fellow did what I was planning to do (which was remove the connection and solder it together) but burned his unit up, violating the warranty along the way. It turns out that the connector has a voltage converter in it and the radio uses 7 volts, not 12. But, after all the time I put into getting the wiring harness sanitary and neat, it galls me to no end to see their hokey setup. All of the black wires in the photo above are part of the radio. That said, it does work.
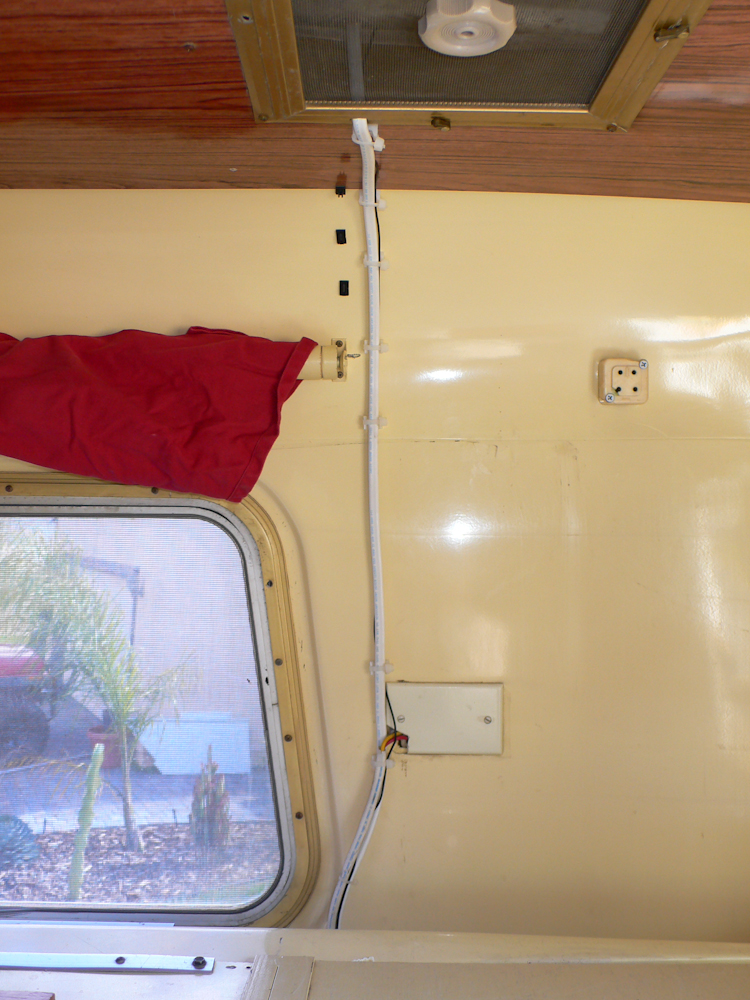
12 AWG marine safety cable and the satellite antenna cable were run to the roof. Recall that the roof of my camper hydraulically elevates, so that makes wiring things to the roof challenging and requires adequate slack in the harness.
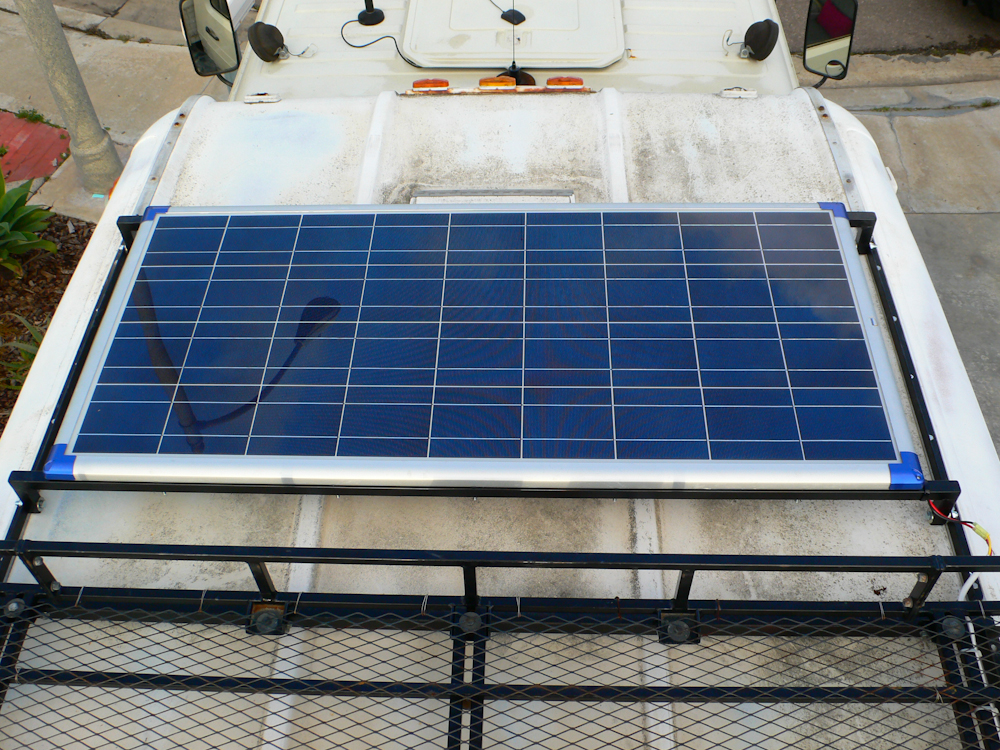
Panel and mounting on the roof.
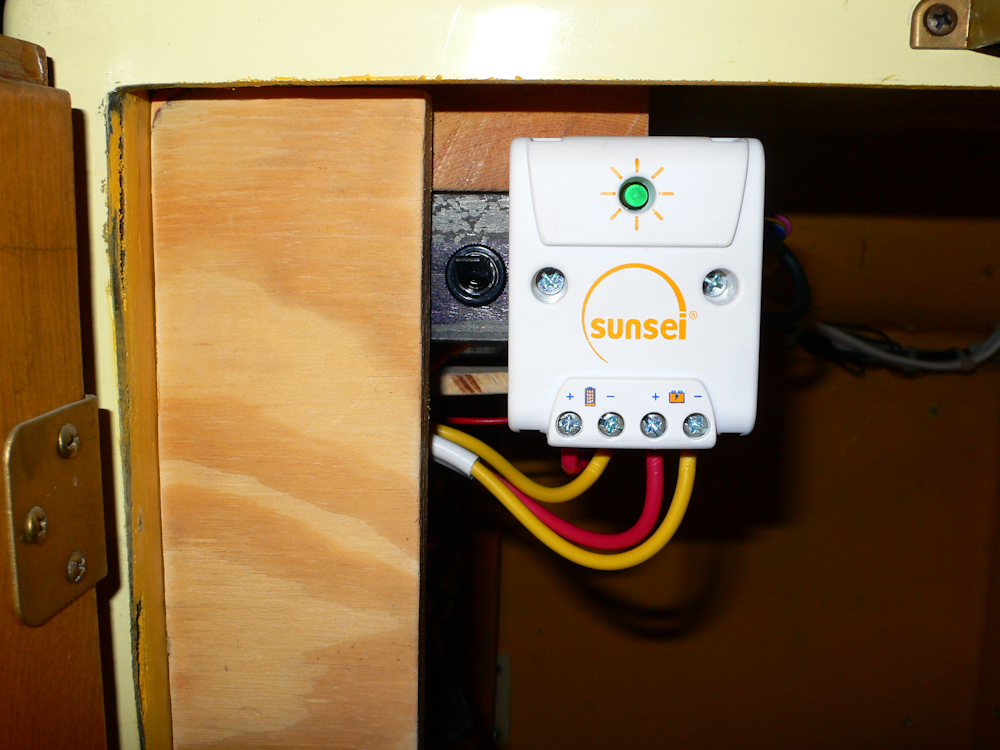
Solar charger and cutoff switch were installed on the newly fabricated bracket.
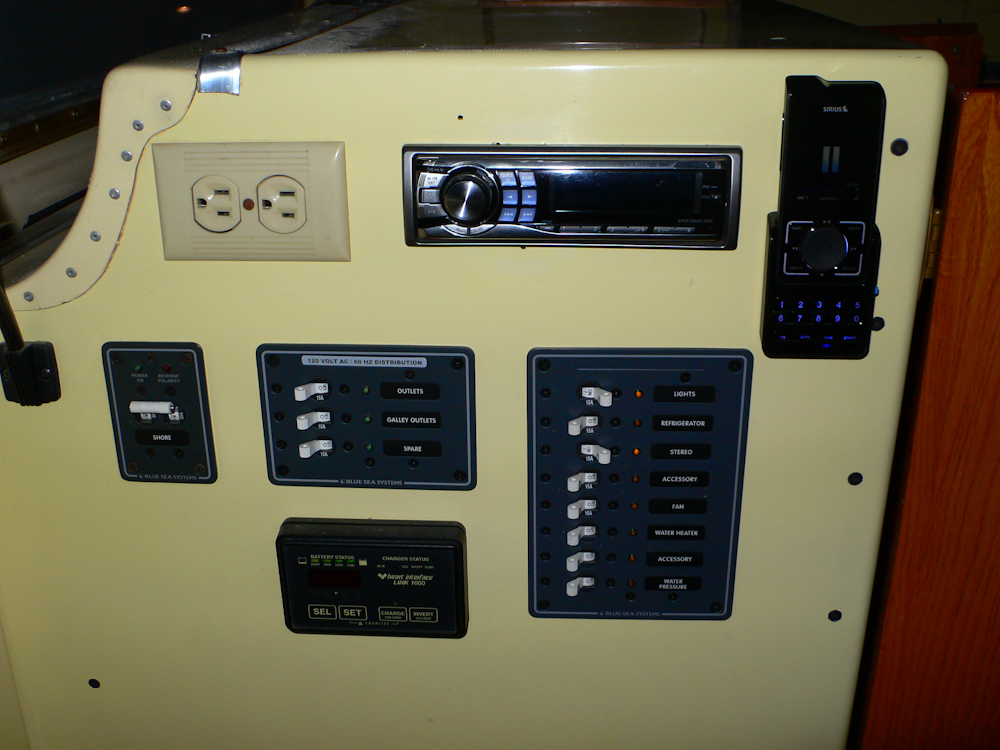
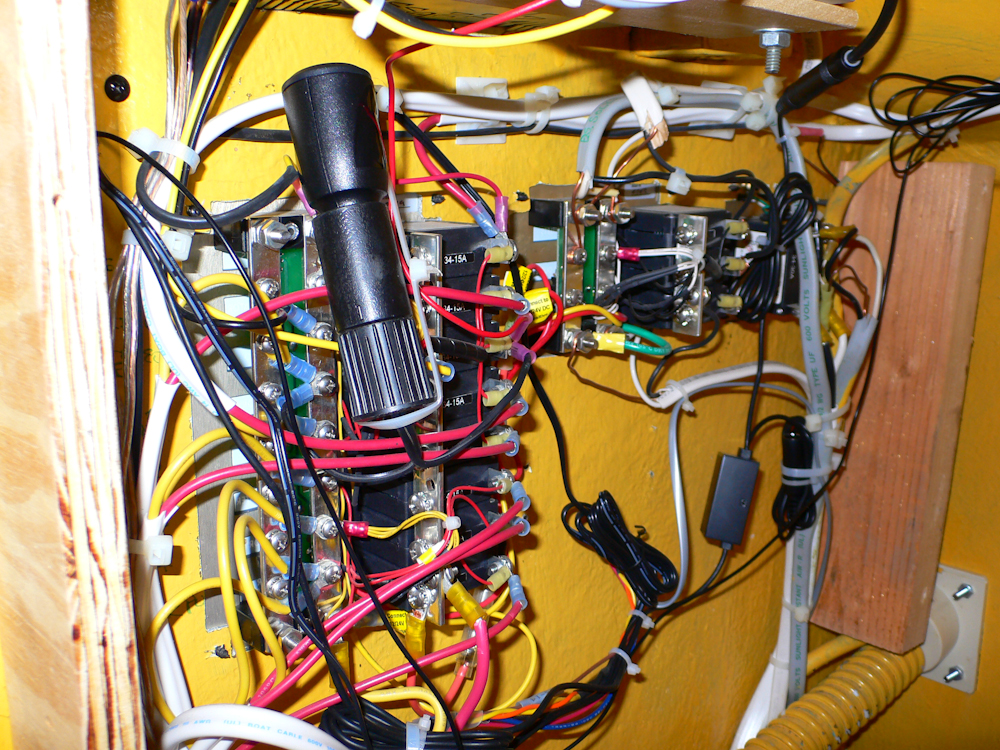
The final setup including the XM system in the upper right.
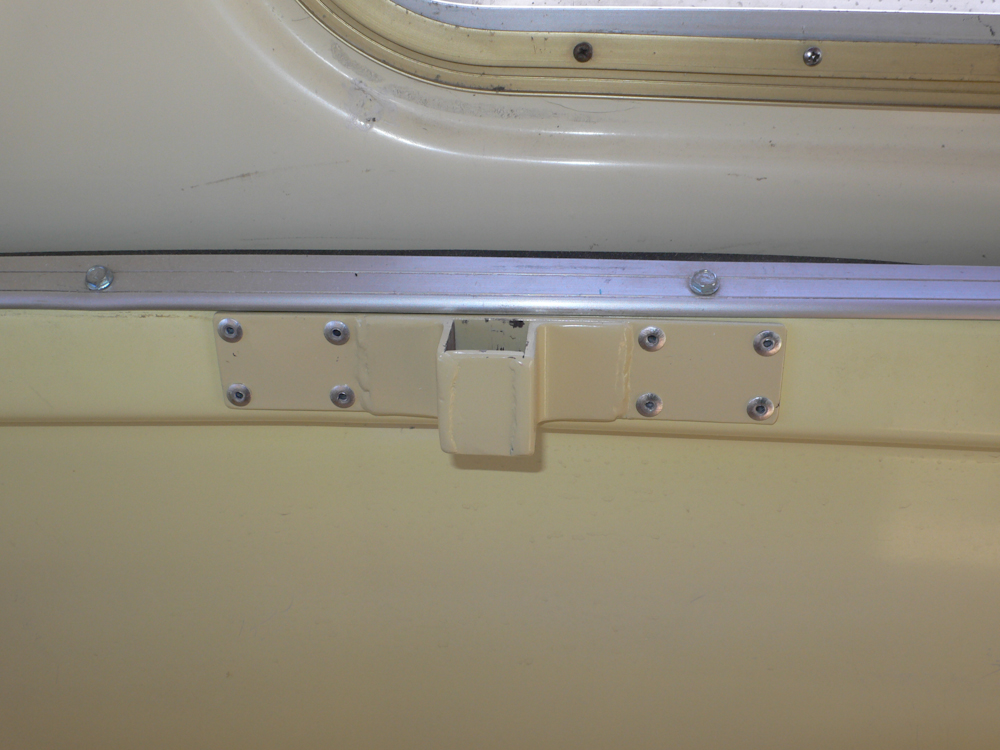
Since idle hands do the devil's work, and we also had a spare computer monitor screen around, I decide to build a mount for it so when we watch DVDs we don't have to watch them on the small laptop screen. Above is the mounting fixture.

We had a 19" panel left over from a dead system, so I welded up a bracket to fit the back and plug into the mount on the camper wall.
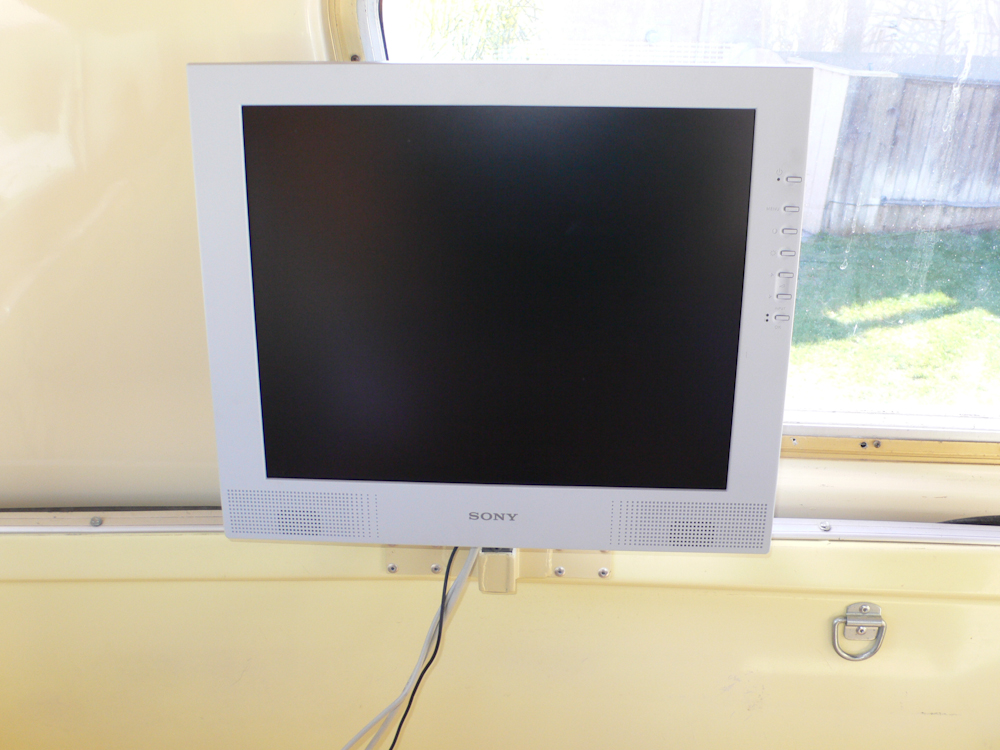
This panel also has speakers mounted in it, so that makes it even better. But , as you might expect, the panel has to be removed for travel and/or lowering the top.
This set of actions was a ton of work and spanned several months. There was along lead time on some of the mog parts, so I had to wait until I got the entire set before proceeding. Thanks to all who helped and special thanks to Mark and Kai.