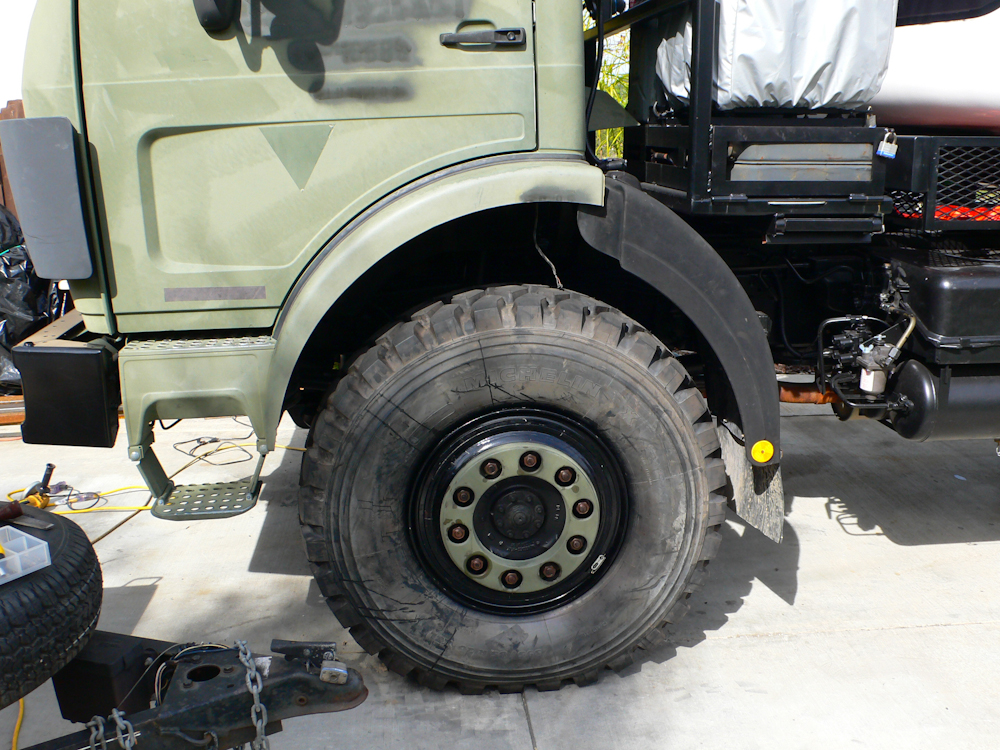
This whole effort is starting to be very much like a job. Mounting the tires and wheels was not all that hard, but the bigger tires required cutting the fenders to prevent mechanical interferences. Our testing suggested that there would STILL be an interference with the steering drag link and spring stack if the wheel were turned to full lock. If the problem actually impacts our ability to manuever, the solution is to go with a slightly narrower tire and take these new tires and put them on the 1300. No harm, no foul.
The
photos below show the fender actions as well as installation of the cab
electrical system and the additon of the next set of cargo boxes.
Two more "big" boxes remain to be installed, but since we plan to head
to Baja California next week, we are delaying that installation until
we return.
The
photos below are what we saw.
A
made a guide attachment for my angle grinder and used a narrow metal
cutting blade. The saw did a great job of making a smooth
cut. We elected to not cut the rubber fender just yet for a
number of reasons.

Once
the fenders were cut, they were removed, sanded and painted. One
of the fenders had taken a hit during the truck's military duty and
needed a bit of pounding out. Due to time constraints, we decided
not to bondo the fender, just paint it and drive on. The fenders
are easy to remove and we will address the cosmetic issues when we get
the cab painted.
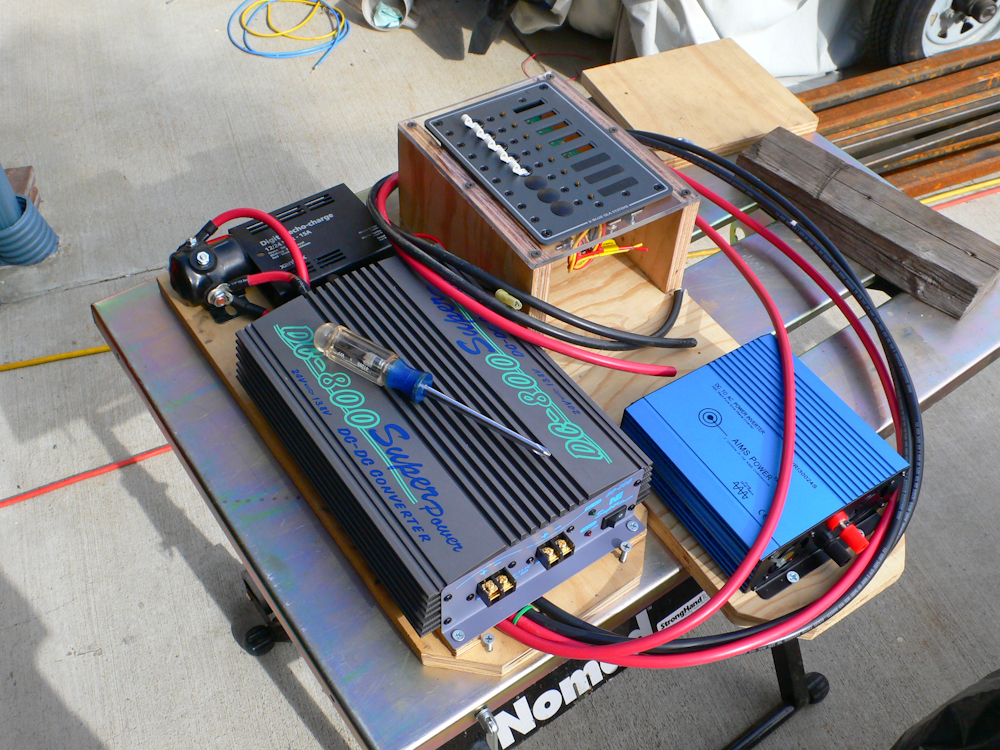
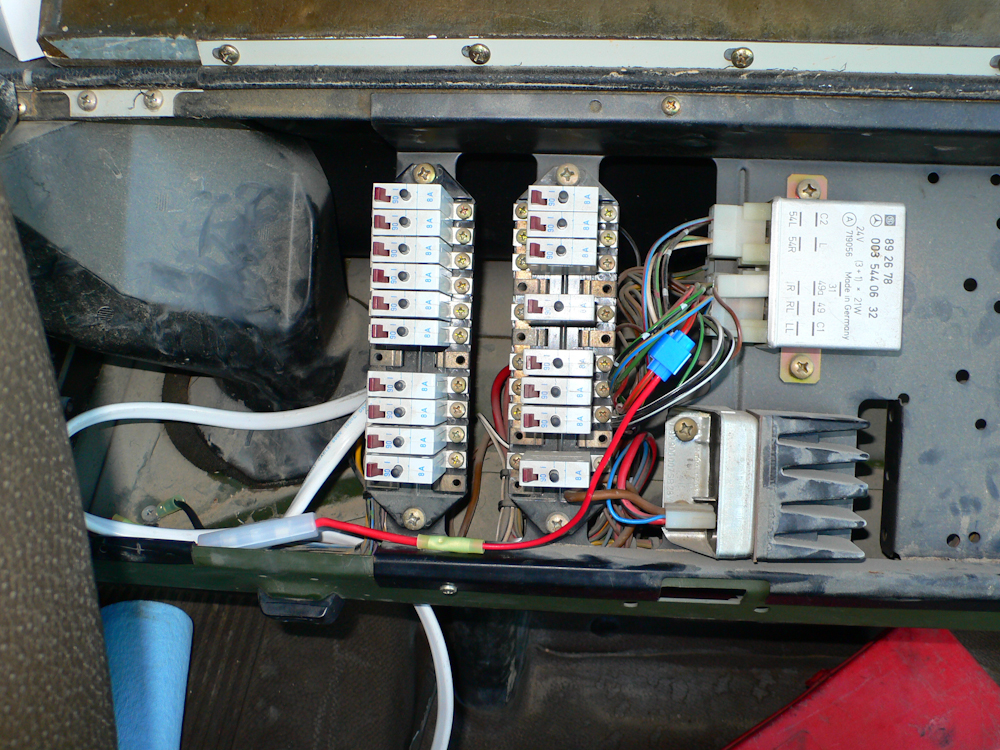
After
the fender, we returned to cab electrical actions. I had
previously fabricated mounting boards for the 2 sets of components that
needed to be installed in the cab. On the left is the 24V ->
12V converter, echo charger and control solenoid. On the right is
the 12V distribution panel and 24V -> 120 VAC inverter.
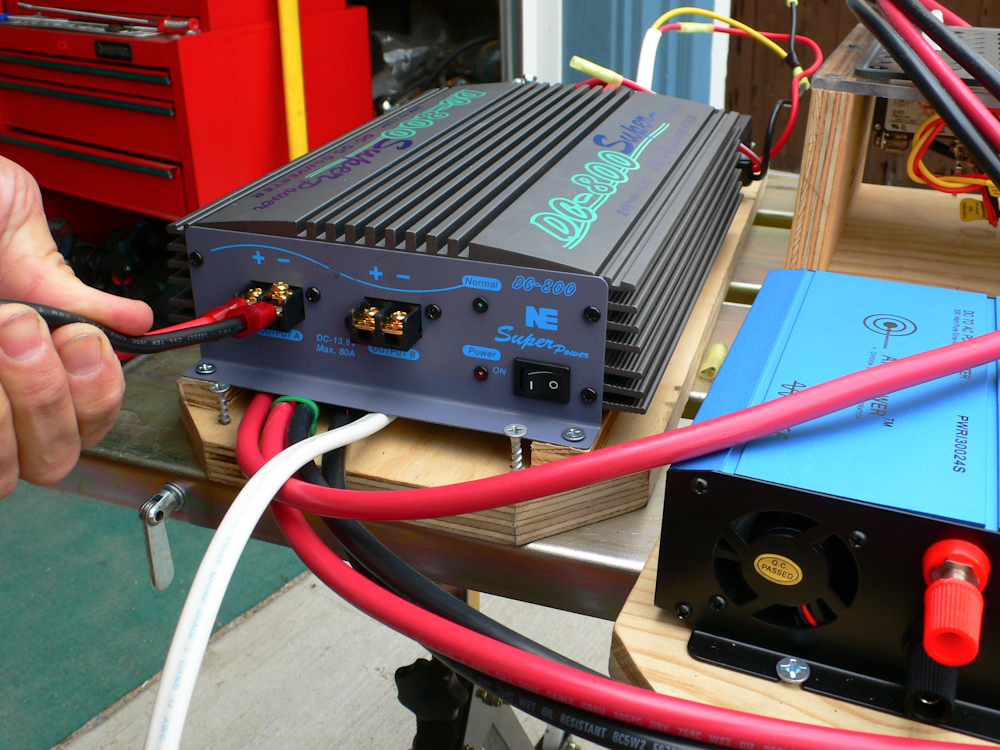
Getting
these large gauge wires in the correct locations and making the bend
radius meet the physical constraints was hard.
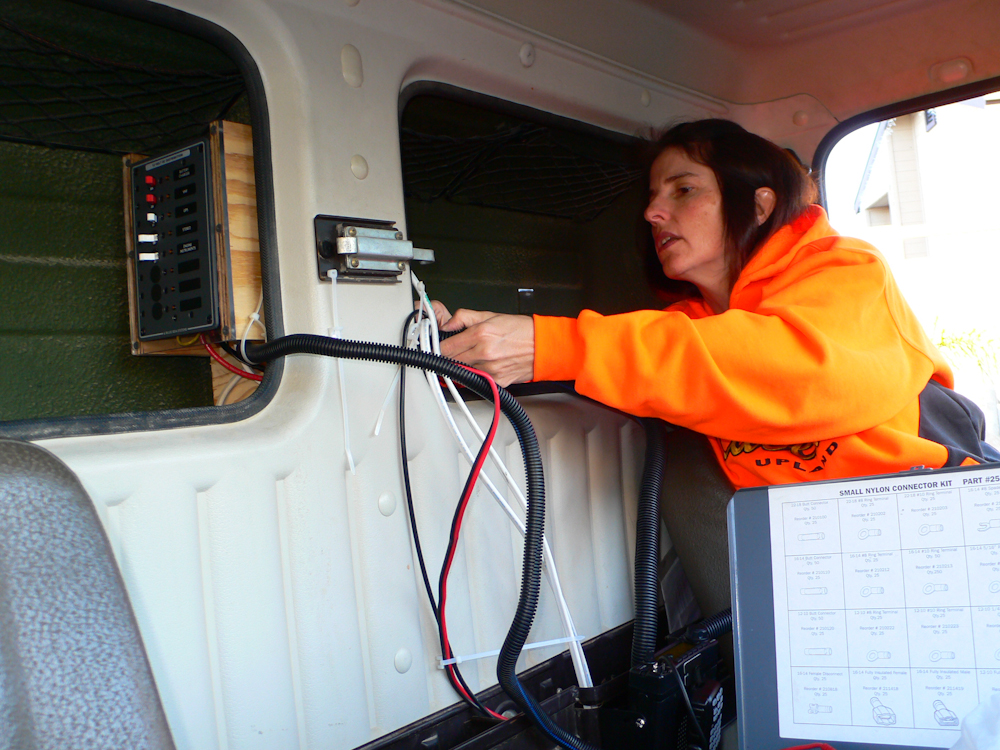
Kathleen
helped with setting up the wire runs and looming the final setup.

Doing
major electrical projects is time consuming and always produces a
mess. Above is the "normal" working environment: connectors,
meter, probe, crimper/stripper, knife, clippers, screws, wire and of
course the ever-present tie-wrap.
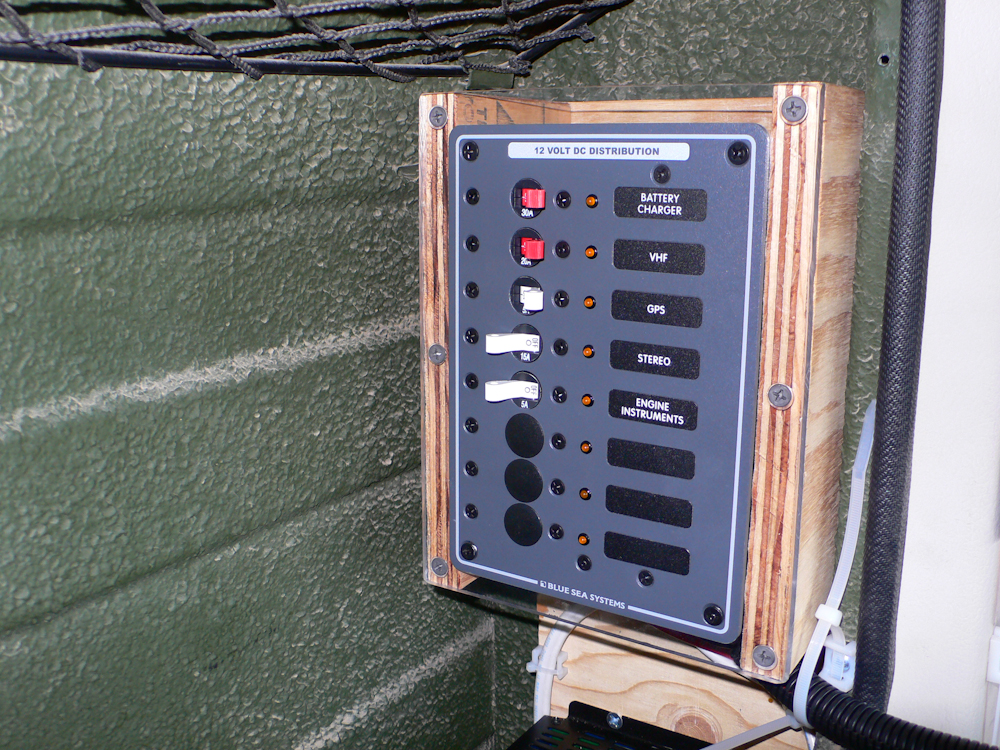
The
DC distribution panel went in pretty easy, but I had already fabricated
the parts. All we had to do was connect the wires in the correct
places. There was, however, a minor annoyance. This setup
required some non-standard circuit breakers which required several
trips to West Marine to obtain. I did win in the end however.

The
24V -> 12V converter was hooked up with a 24V continuous duty
solenoid to insure that power to the unit was shut off when the
ignition key is removed. The echo charger is used to charge the
"house" batteries while the 1017 engine is running.
Getting
the control signal for the solenoid required diving into the main
circuit breaker panel for the 1017. Sadly, I do not have a
circuit diagram, so I had to use my probe to choose an appropriate wire
to tap in to. The connection was made with 12 gauge marine safety
cable (white wire).

The
high current 24V source was run directly from the battery terminals
using #6 cables. These cables had to attach to power posts on the
fender to allow easy disconnection should the cab need to be raised for
maintenance actions. The echo charger 12V line is a separate
cable through a separate connection. The Y branch of the loom
contains the coax cable for the 2 meter radio antenna on the roof of
the cab.
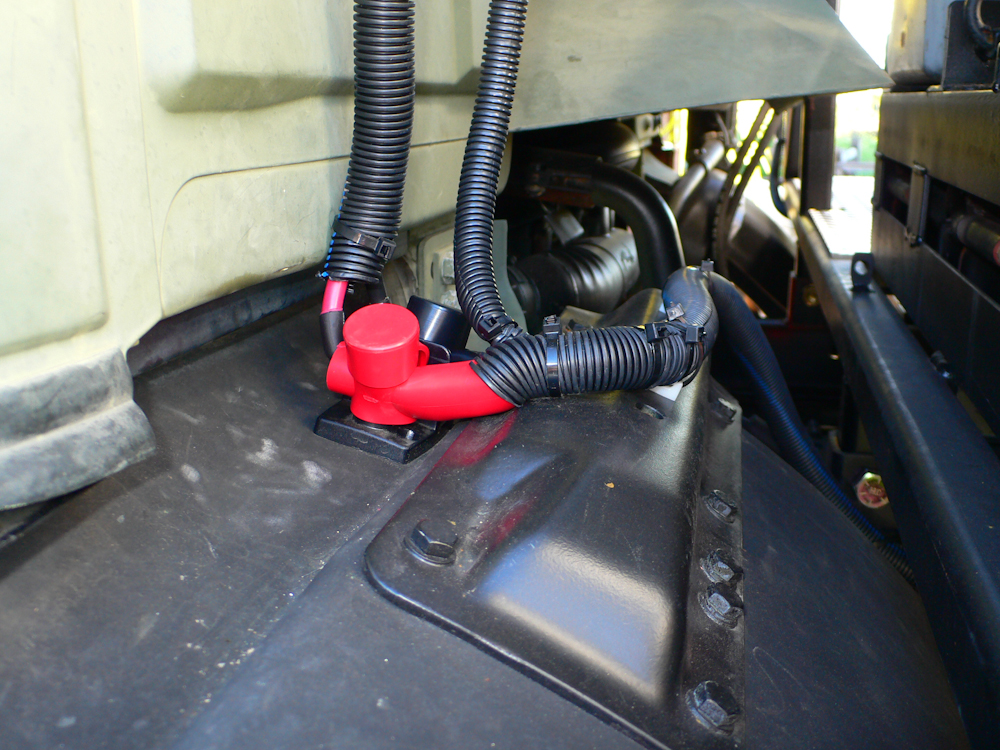
I
got the power posts from, no surprise, West Marine. The posts
came with the nifty plastic insulating caps. Running the pair of
#6 cables in looms was somewhat of a challenge, but we did find a nice
routing.
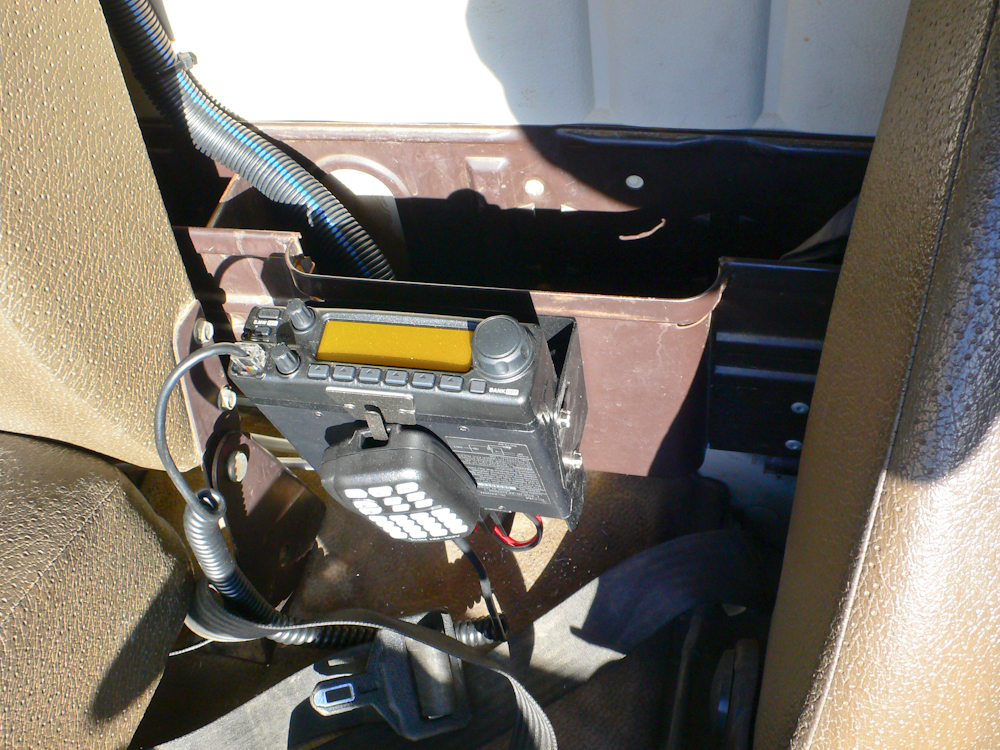
When
the 12V was in and the antenna cable was run, I mounted a new Icom 2200
2m transciever.
Once
the electrical was stable, we went back to steel work for the cargo
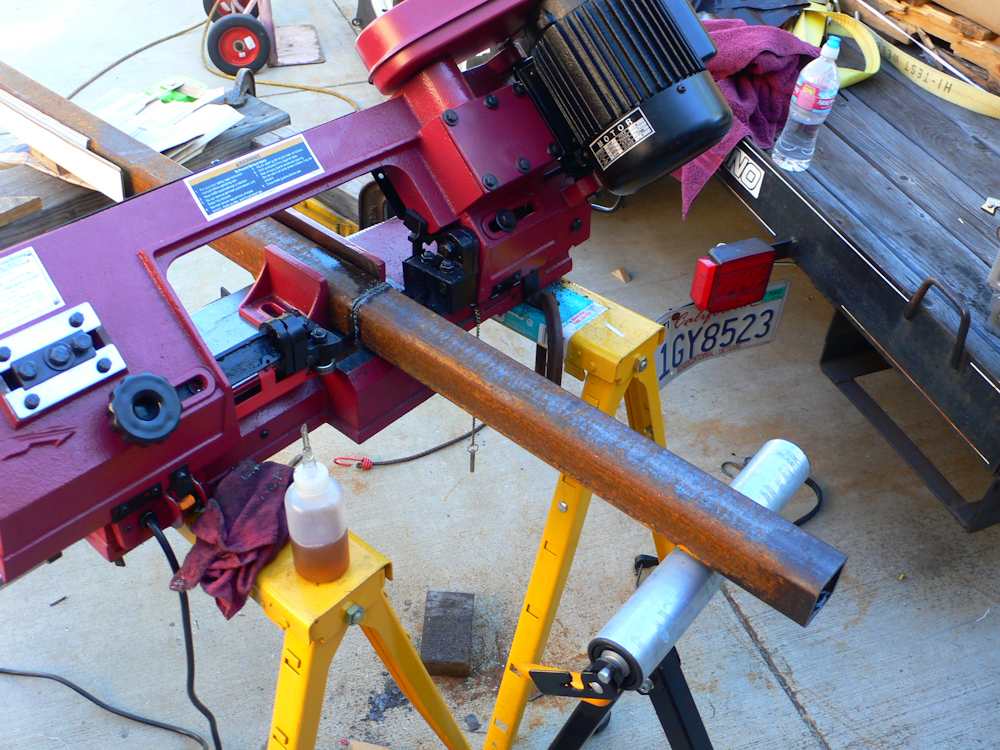
boxes. The mounts for the 24x24x36" boxes were cut from 2"x1/4"
square tubing. My el-cheapo band saw from Harbor Freight still
works fine.
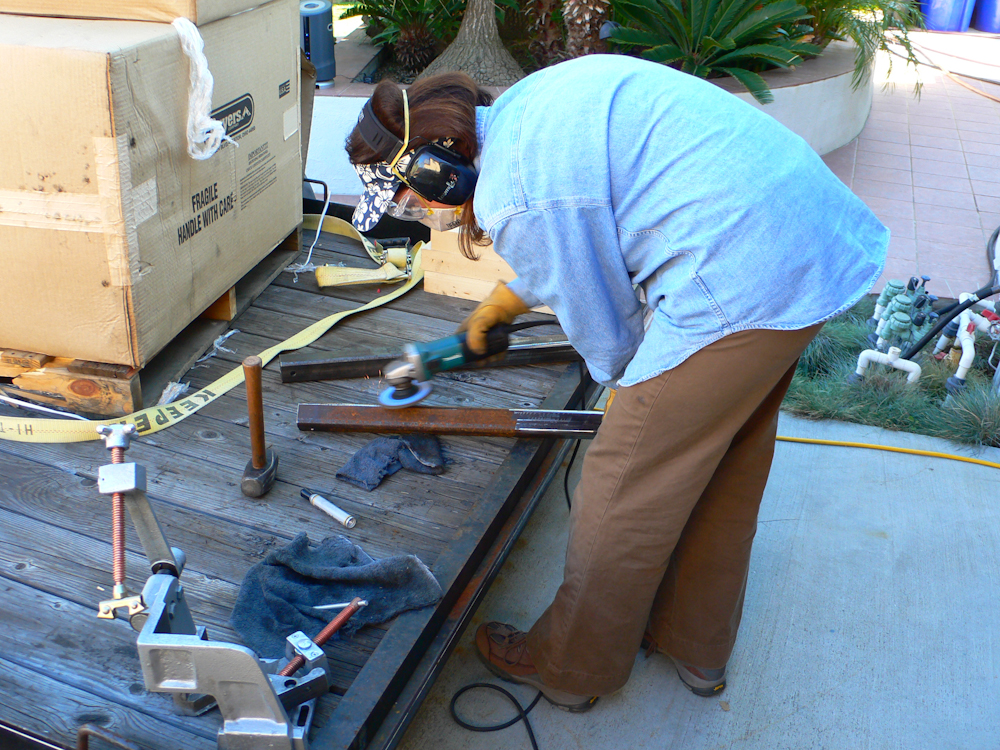
Kathleen
cleans off the surface rust from the tubing while I cut the balance of
the parts. My 3D corner jig is visible at the lower left of the
photo above. It worked great.
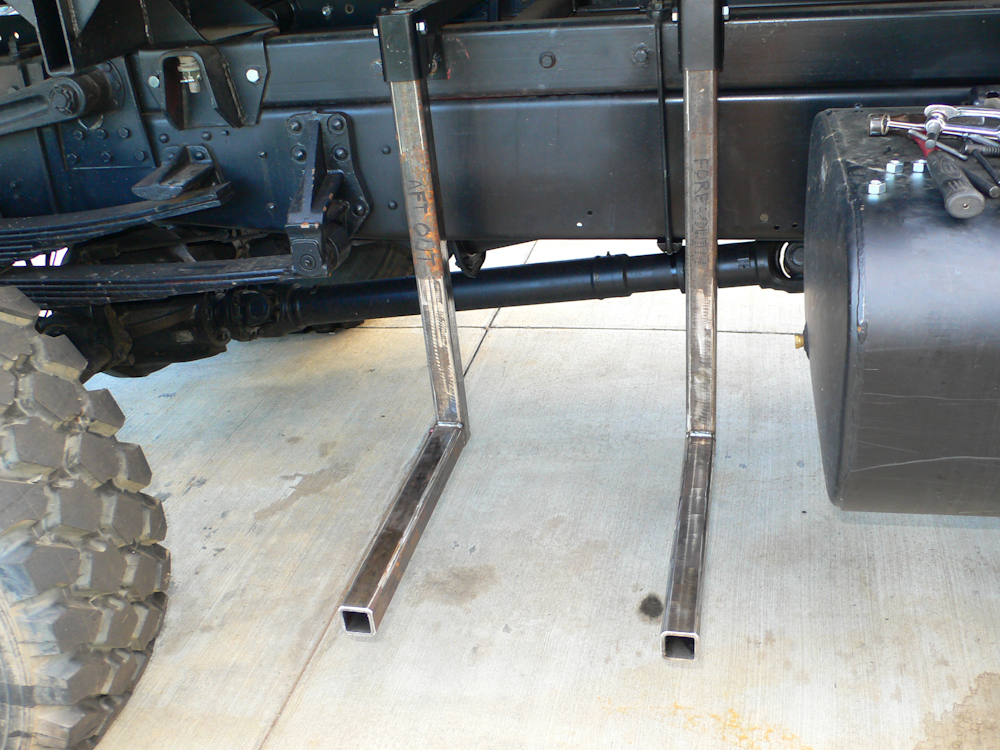
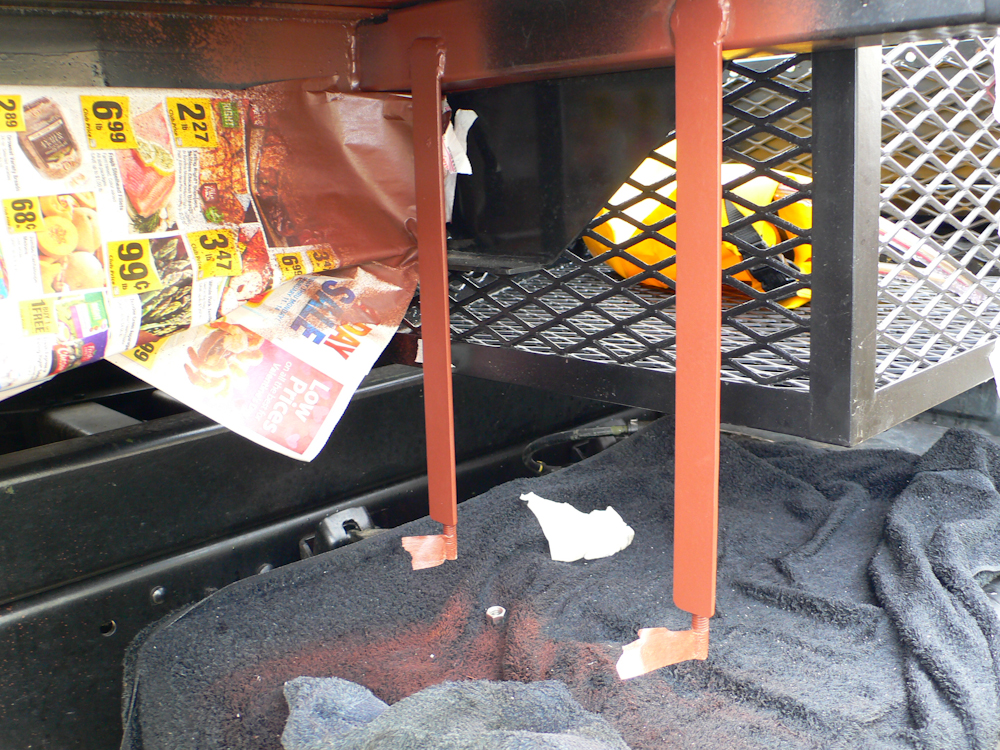
The
brackets were test fitted in the mounts.
Floor
braces were cut, fitted and welded into place.
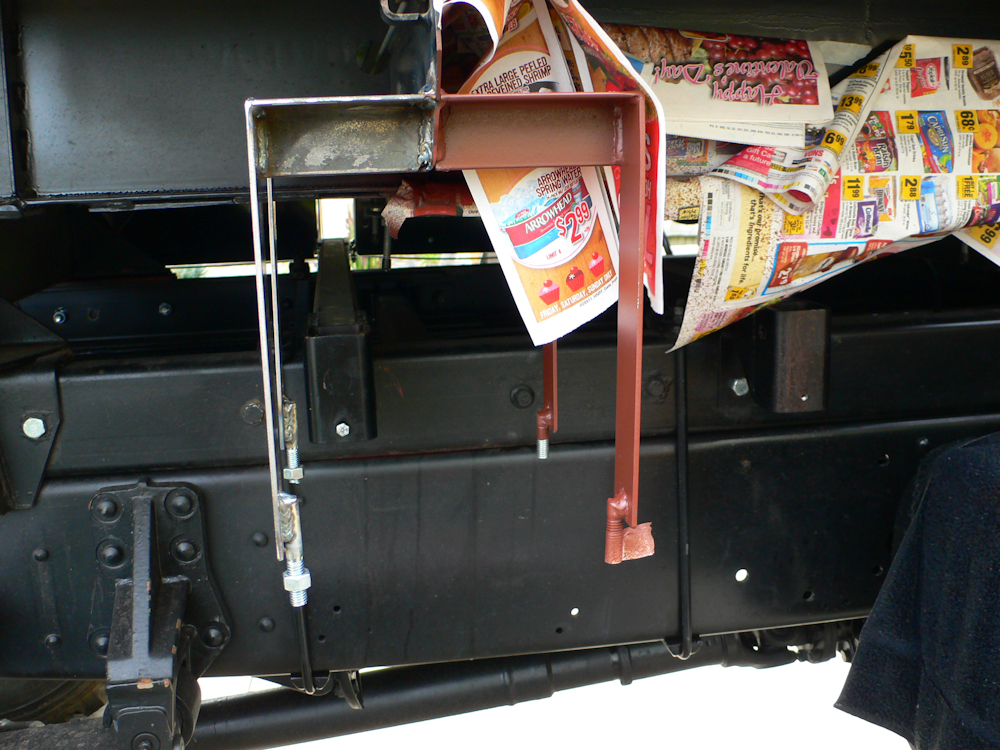
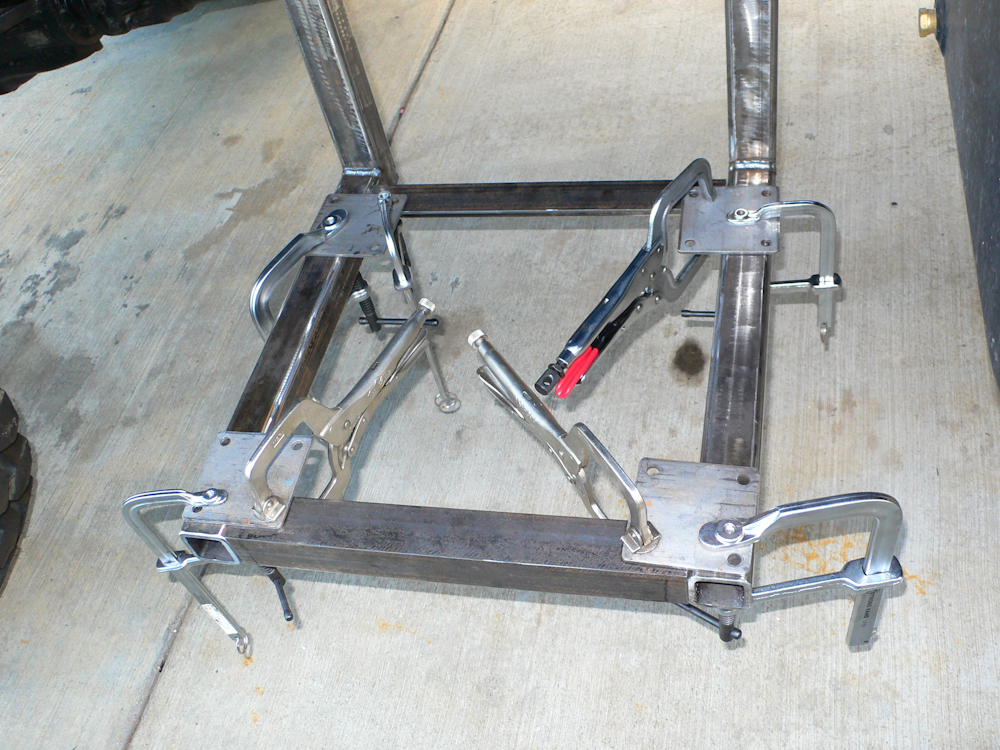
Mounts
for the camper cargo boxes were fabricated, welded and primed.
Due
to the geometry of the frame, the mounts were assymetrical and each one
was unique slowing the installation.
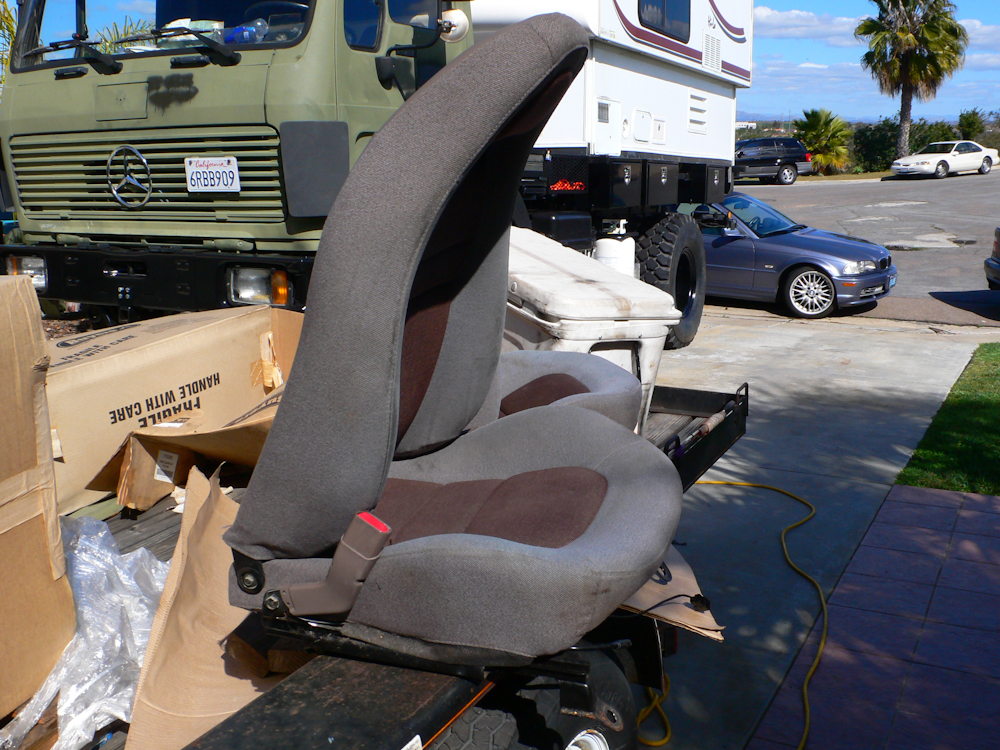
Kathleen
whined enough about the decaying seats in the 1017 to get me to take
action. The seats are just old and the vinyl is cracked and the
foam is eroded. A trip to the upholstery shop is planned, but due
to scheduling, we could not get a slot before our baja trip. So,
to silence the noise, I agreed to attempt to get new seats before the
trip. We made a trip to one of the many junk yards in Chula Vista
next to the Mexican border and found these seats. We had to
remove them ourselves and carry them up a big hill to get out of the
place, but the price was right: $20 for BOTH seats. The bad news
was that when we got the seats to where we could carefully inspect both
the 1017 stock seats and these, we both agreed that this would be a
lengthy and complex steel work project and nothing that could be
reasonably completed before our departure. So, the seats went
into the garage and the action went "onto the stack" for prosecution
upon our return.
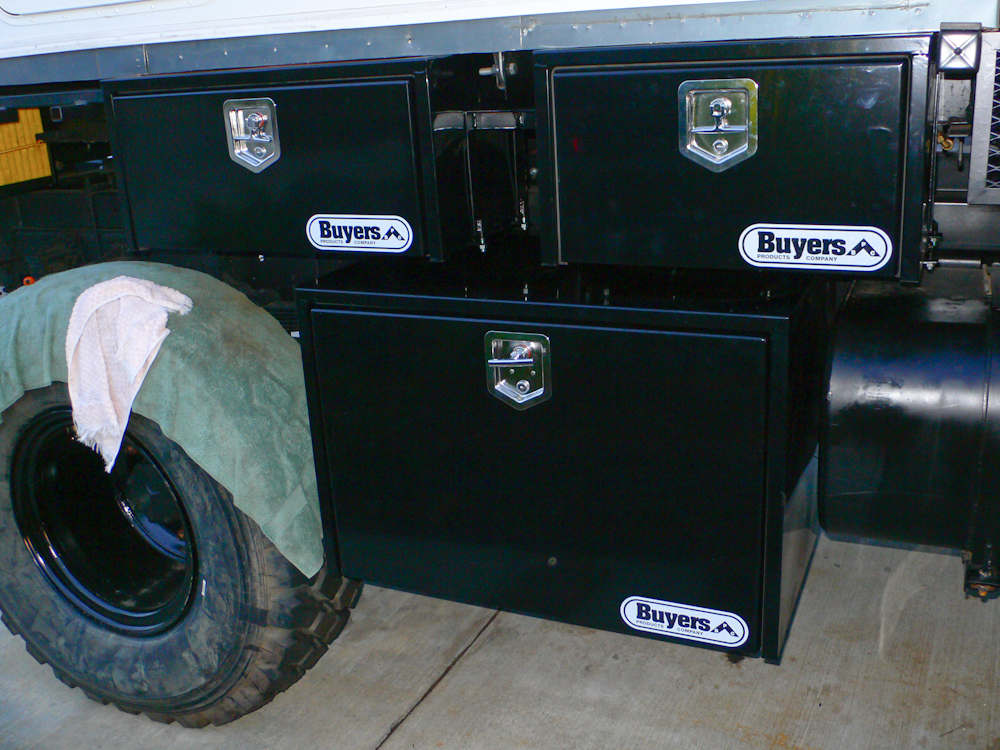
We
prepped, primed and painted the box mounting frames and installed the
boxes. All the boxes were pop riveted to their lower supports to
prevent shifting when off road. The manufacturer's stickers were
removed after this photo.
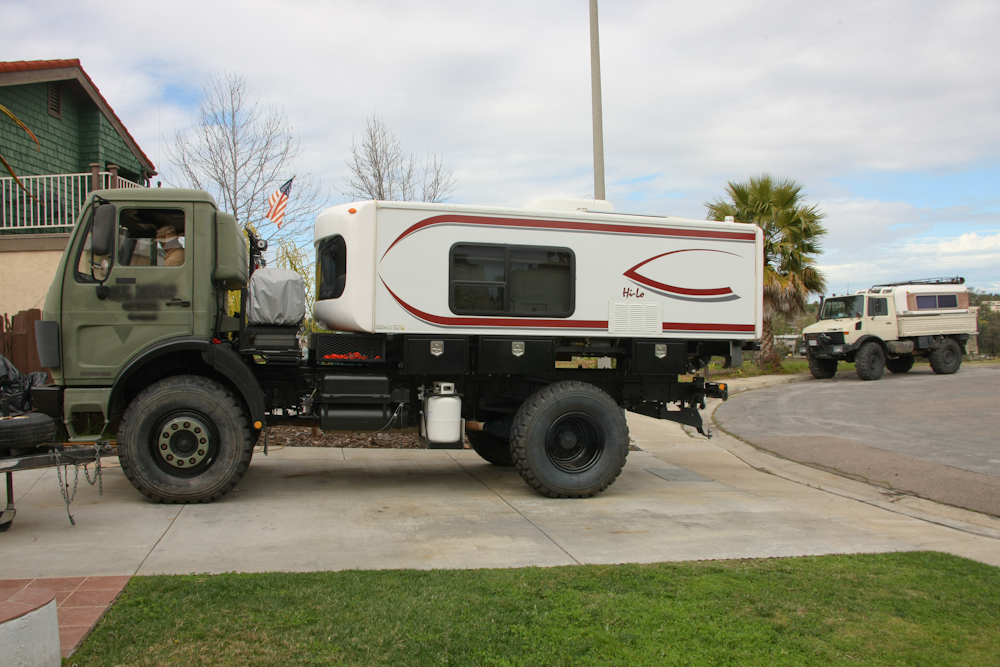
We
set up for a road test after the boxes were mounted. These
tires/wheels are virgin and have not been out of the driveway since
they were mounted a few weeks ago. My 1300 is visible at the far
right of the photo above.
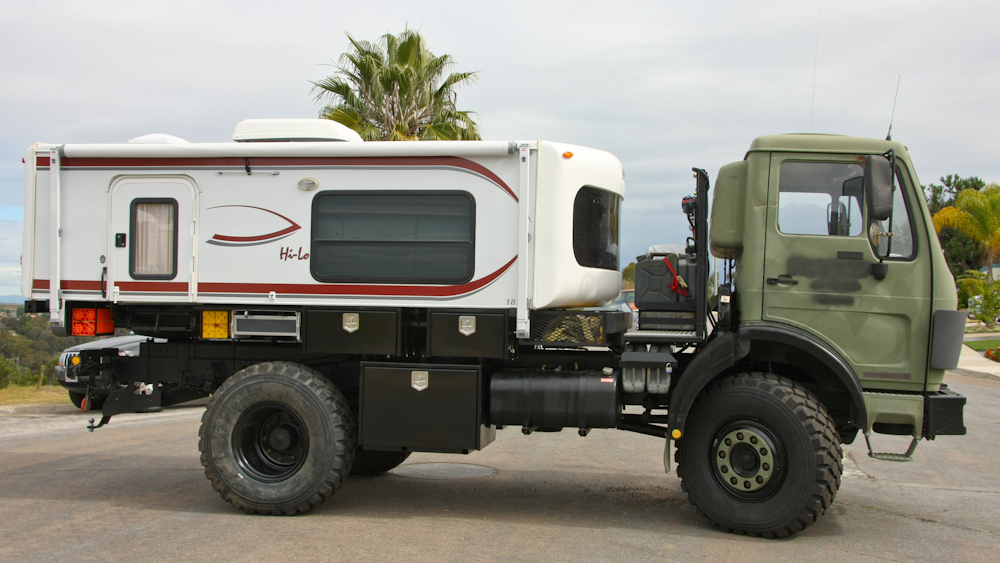
A
view of the passenger side shows the new cargo boxes that have been
mounted since the last report. Note that 2 more big boxes are
planned to be mounted aft of the rear wheels at the same height, and
with the same mounting method, as the current big box.
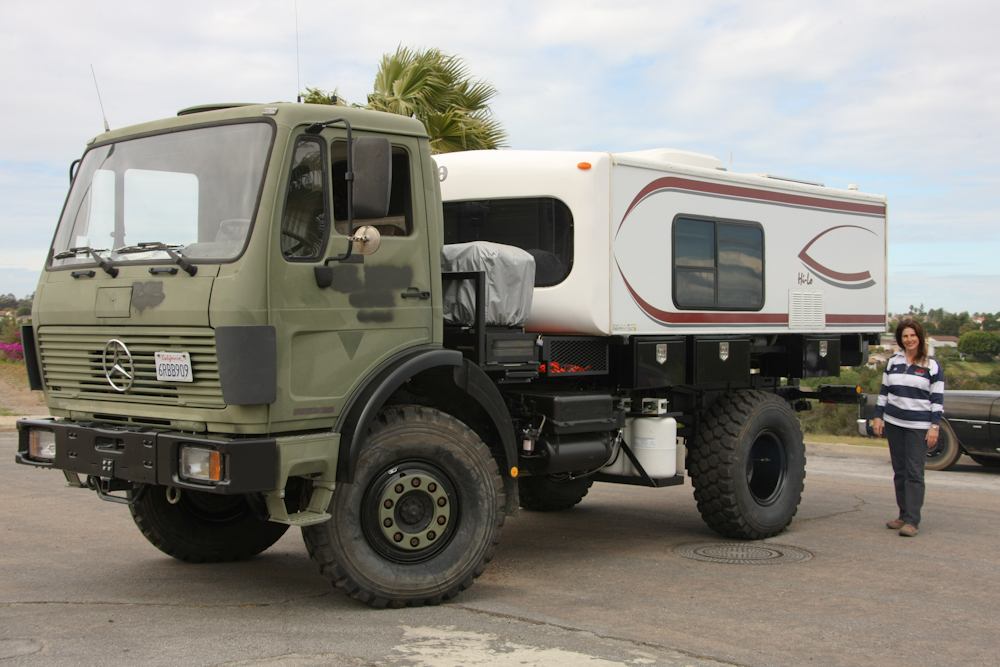
Kathleen
performs her walk-around before the test drive. Note that we now
have valid California plates for the truck. Our "disagreement"
with the DMV was resolved in my favor.
As with every other segment I have posted, this was more work, more time consuming and more expensive than expected. But, also like the other segments, we prevailed and have been happy with the results.
Up next: a
shakedown trip to Baja with the San Diego unimog contingent.
Then, the balance of the cargo boxes, completed cab electrical, carpet,
reupholstry, cab paint, cabinet work in the camper and damage repair
from the baja trip (assuming there is damage).
| Previous Adventure | ||
| Trip Home Page |
Photos and Text Copyright Bill Caid 2011, all rights
reserved.
For your enjoyment only, not for commercial use.